> ## Documentation Index
> Fetch the complete documentation index at: https://docs.risingwave.com/llms.txt
> Use this file to discover all available pages before exploring further.
# Set up Single Sign-On (SSO) for your organization
> Single Sign-On (SSO) is an authentication method that allows a user to access multiple applications with one set of login credentials.
RisingWave Cloud supports SAML-based identity provider (IdP) platforms for SSO.
This article will guide you through the process of setting up SSO for your organization on RisingWave Cloud and logging in with SSO.
## Setting up SSO configuration
### Step 1: Create a SAML application on your IdP platform
Begin this process by setting up a SAML application on your IdP platform, such as Okta.
During the setup, provide placeholder values for the following fields:
* **SP Entity ID or Issuer or Audience URI**
* **Assertion Consumer Service (ACS) URL**
Configure the properties below on the IdP platform:
| Property | Description |
| :------------------------------- | :--------------------------------------------------------------------------------------------------------------------------------------------------------------------------------------- |
| **IdP Single Sign-On URL** | URL of the receiver of the SAML AuthNRequest. Use a placeholder value initially. You'll get the actual value from your IdP after providing it with the Atlas metadata. |
| **IdP Signature Certificate** | PEM-encoded public key certificate of the IdP. You can obtain this value from your IdP. You can either upload the certificate from your computer or paste the contents into a text box. |
| **Request Binding** | SAML Authentication Request Protocol binding used to send the AuthNRequest. It can be either **HTTP POST** or **HTTP REDIRECT**. |
| **Response Signature Algorithm** | Response algorithm used to sign the SAML AuthNRequest. It can be either **SHA-256** or **SHA-1**. |
***
### Step 2: Configure SSO on RisingWave Cloud
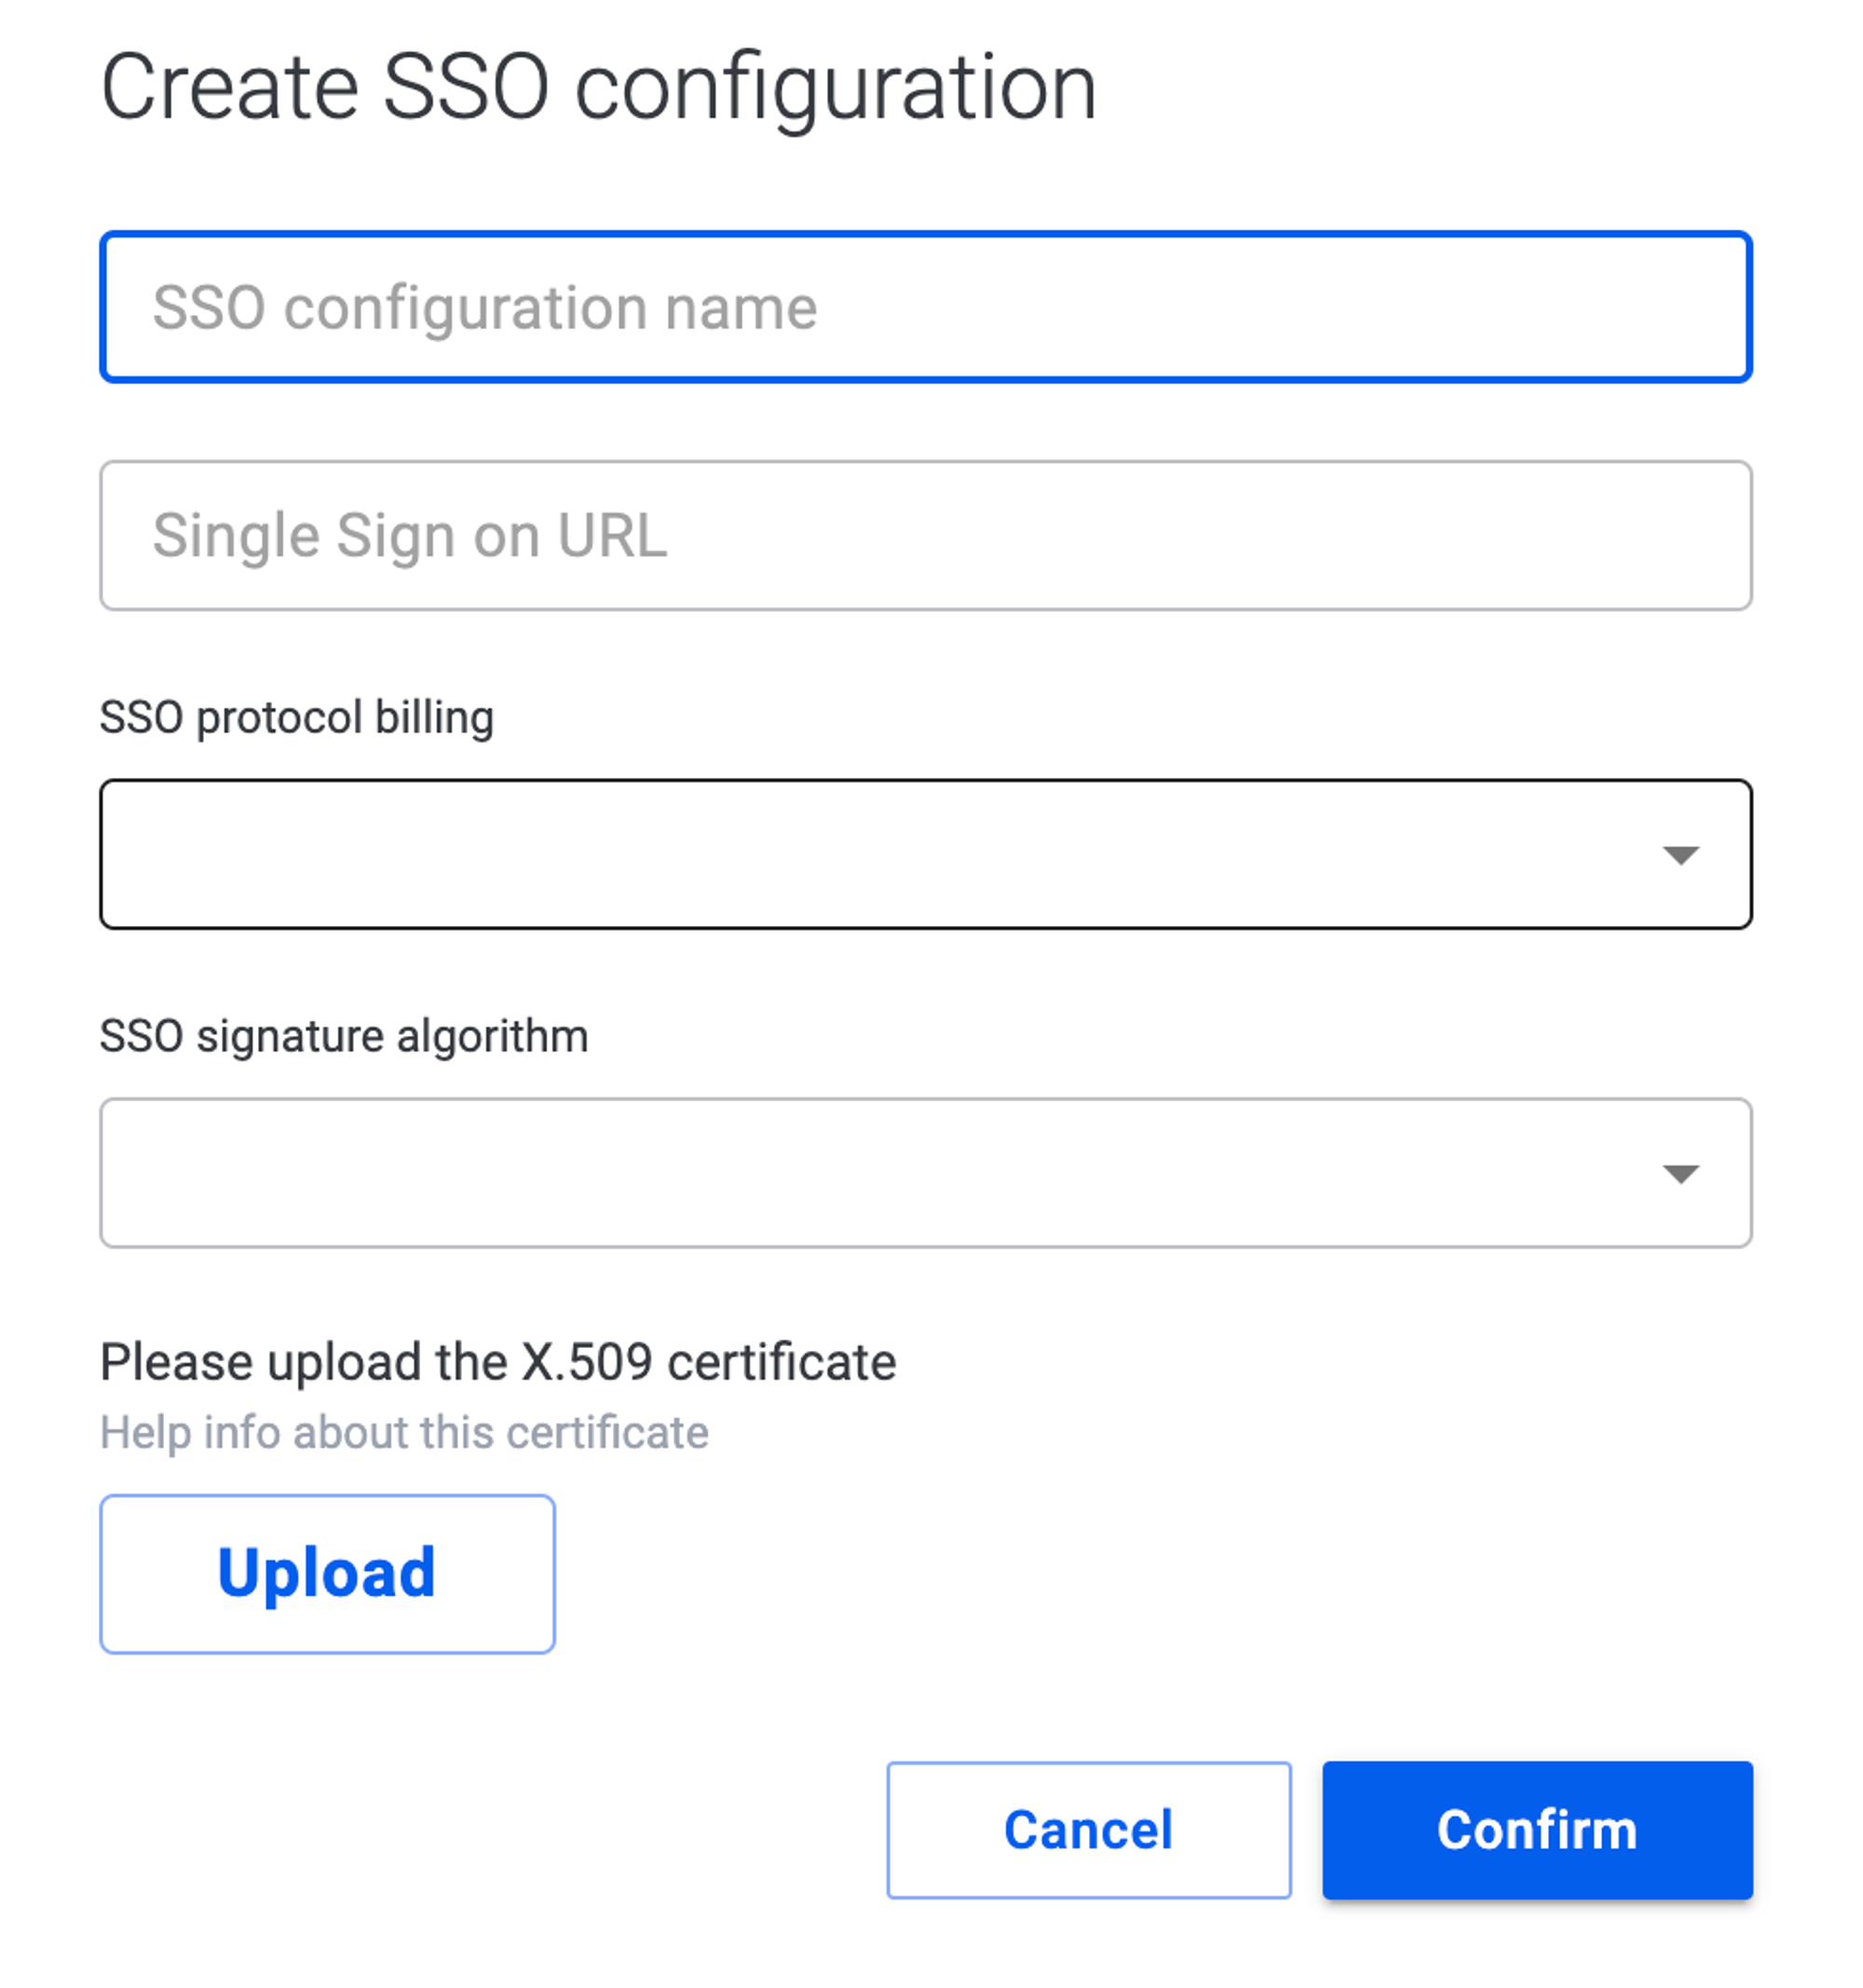
1. Go to the [**Org.**](https://cloud.risingwave.com/organization/) tab and select **SSO configuration**.
2. Click **Create SSO configuration**.
3. Create a descriptive name for your SSO configuration. Enter the SSO URL, select the protocol and signature algorithm you used on your IdP platform, and upload the IdP certificate.
1. Log in to your Okta account and navigate to the **Applications** section.
2. Select the SAML application you created for RisingWave Cloud.
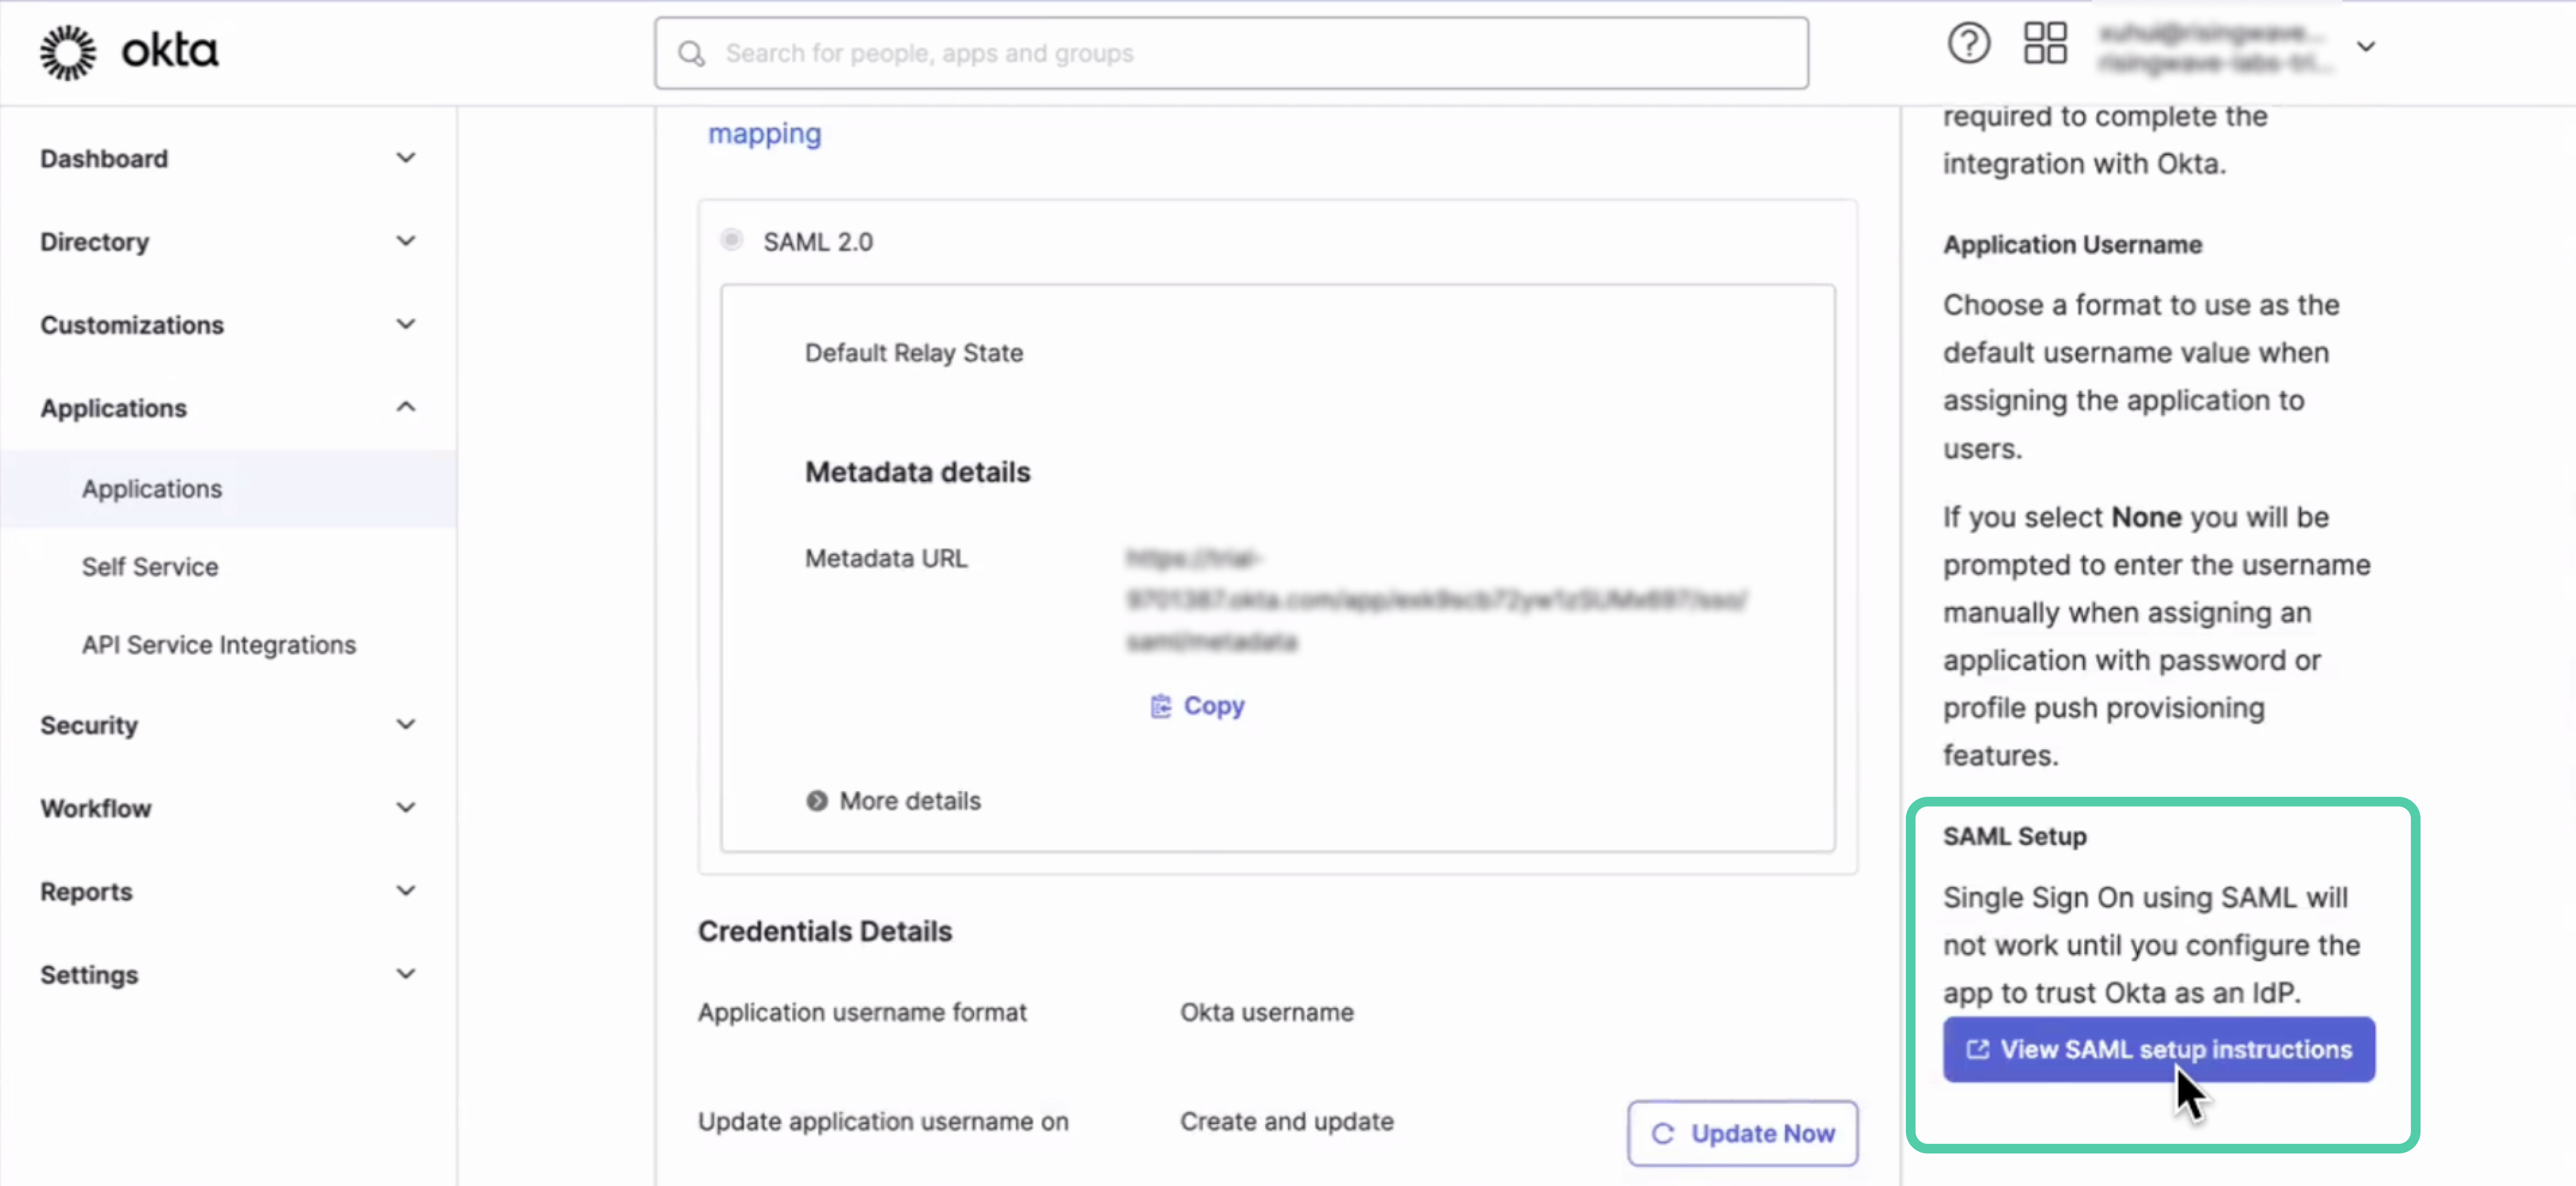
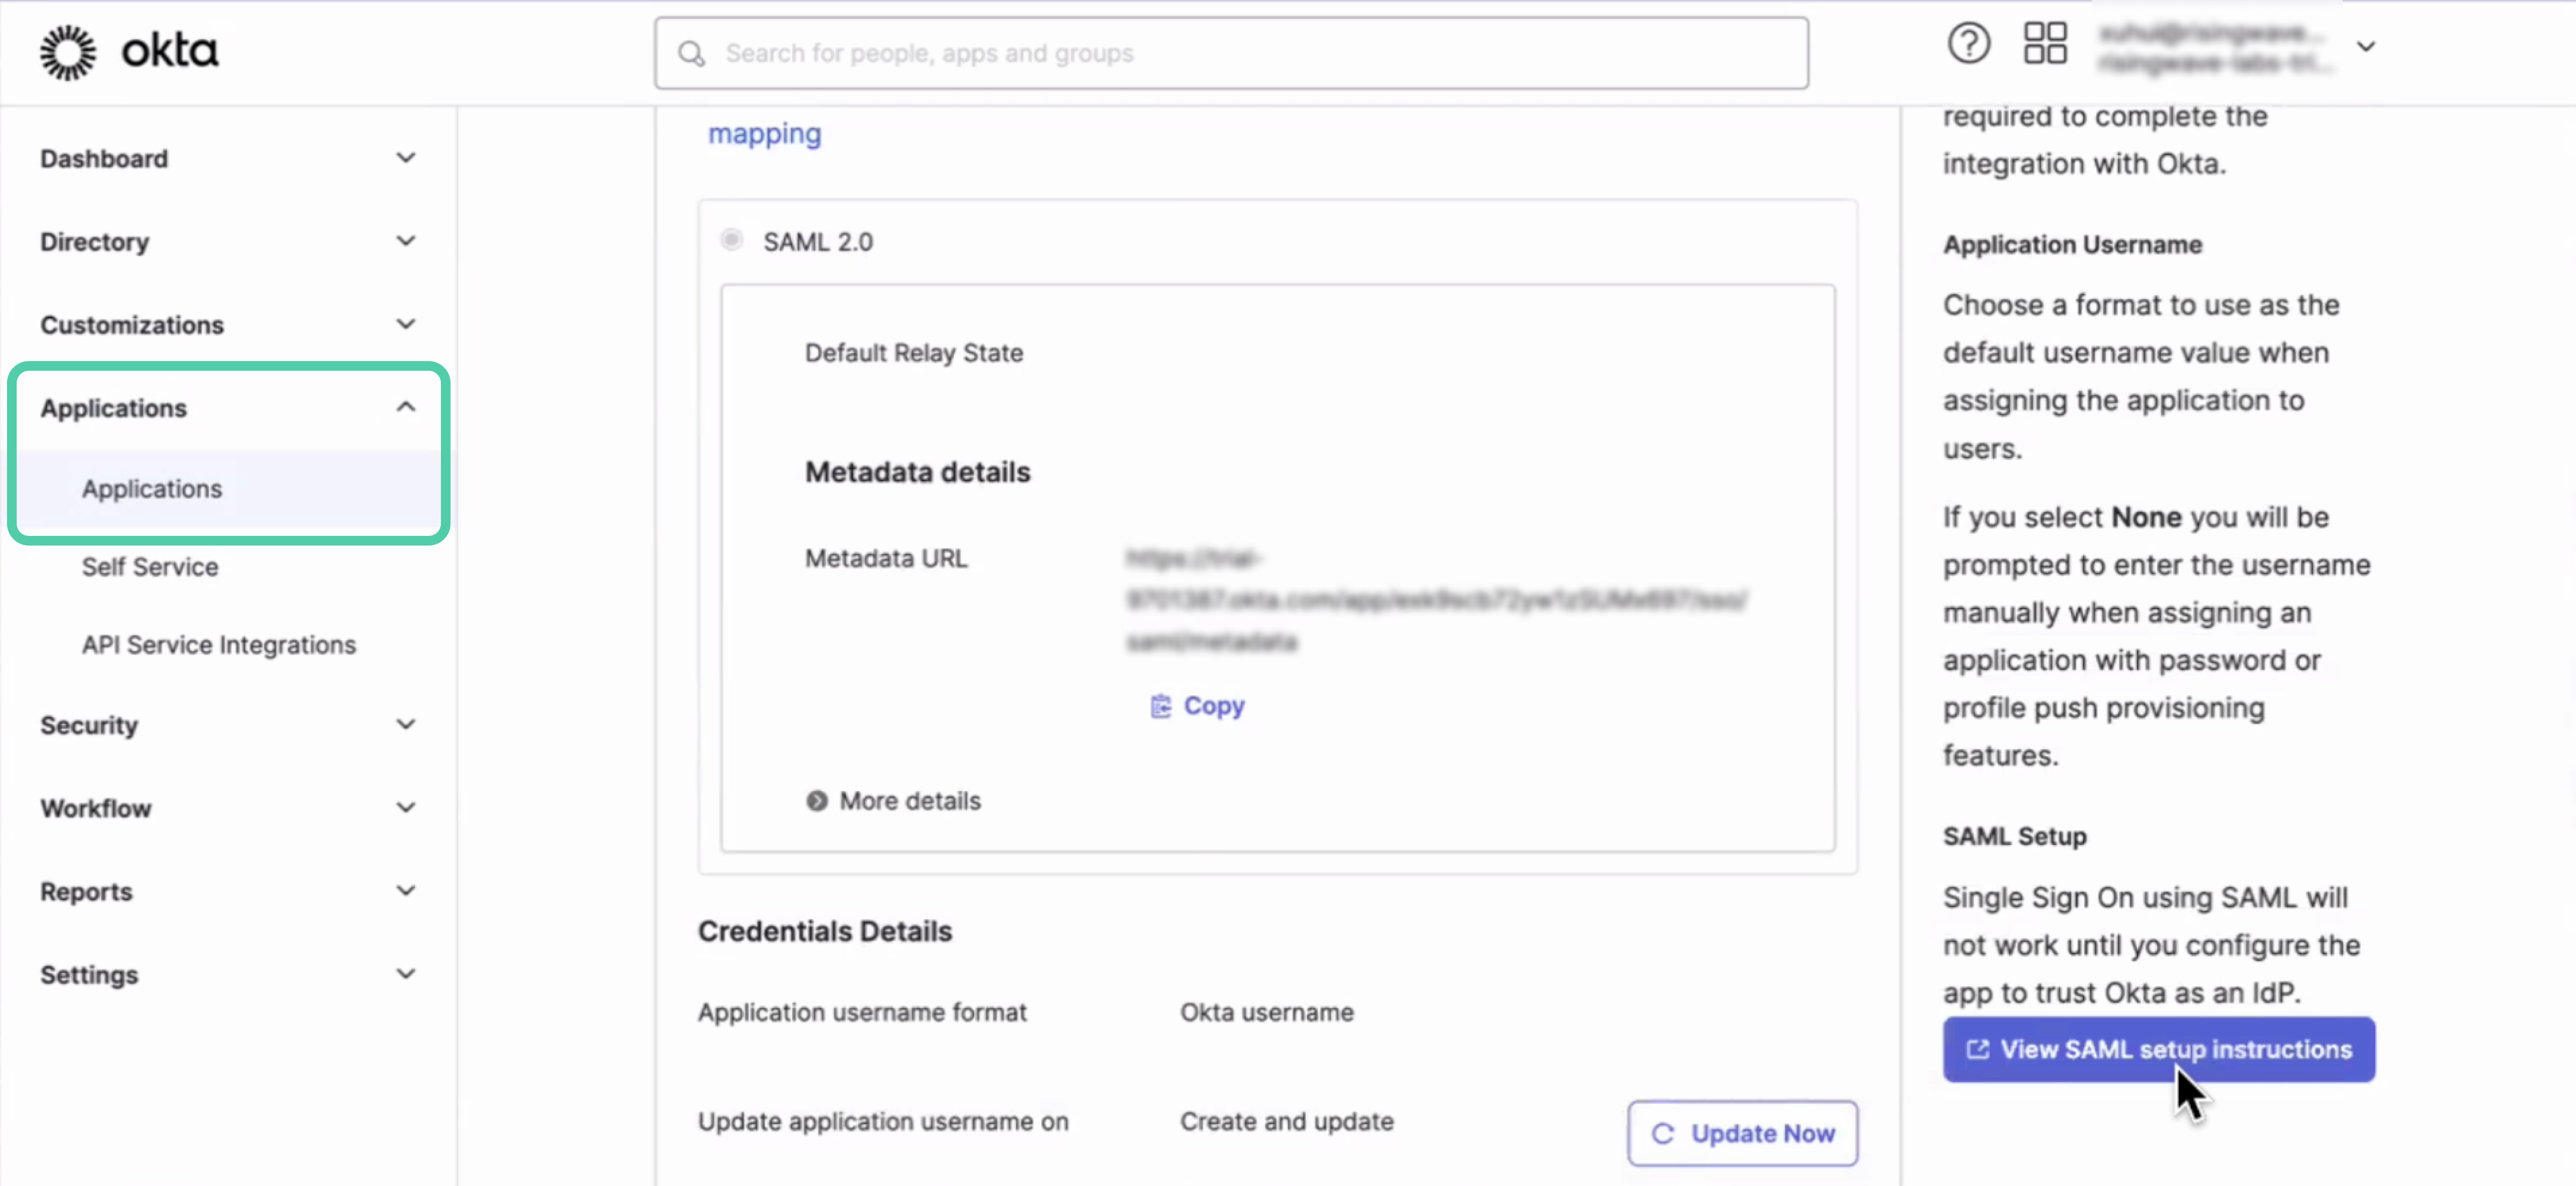 3. Click **View SAML setup instructions**.
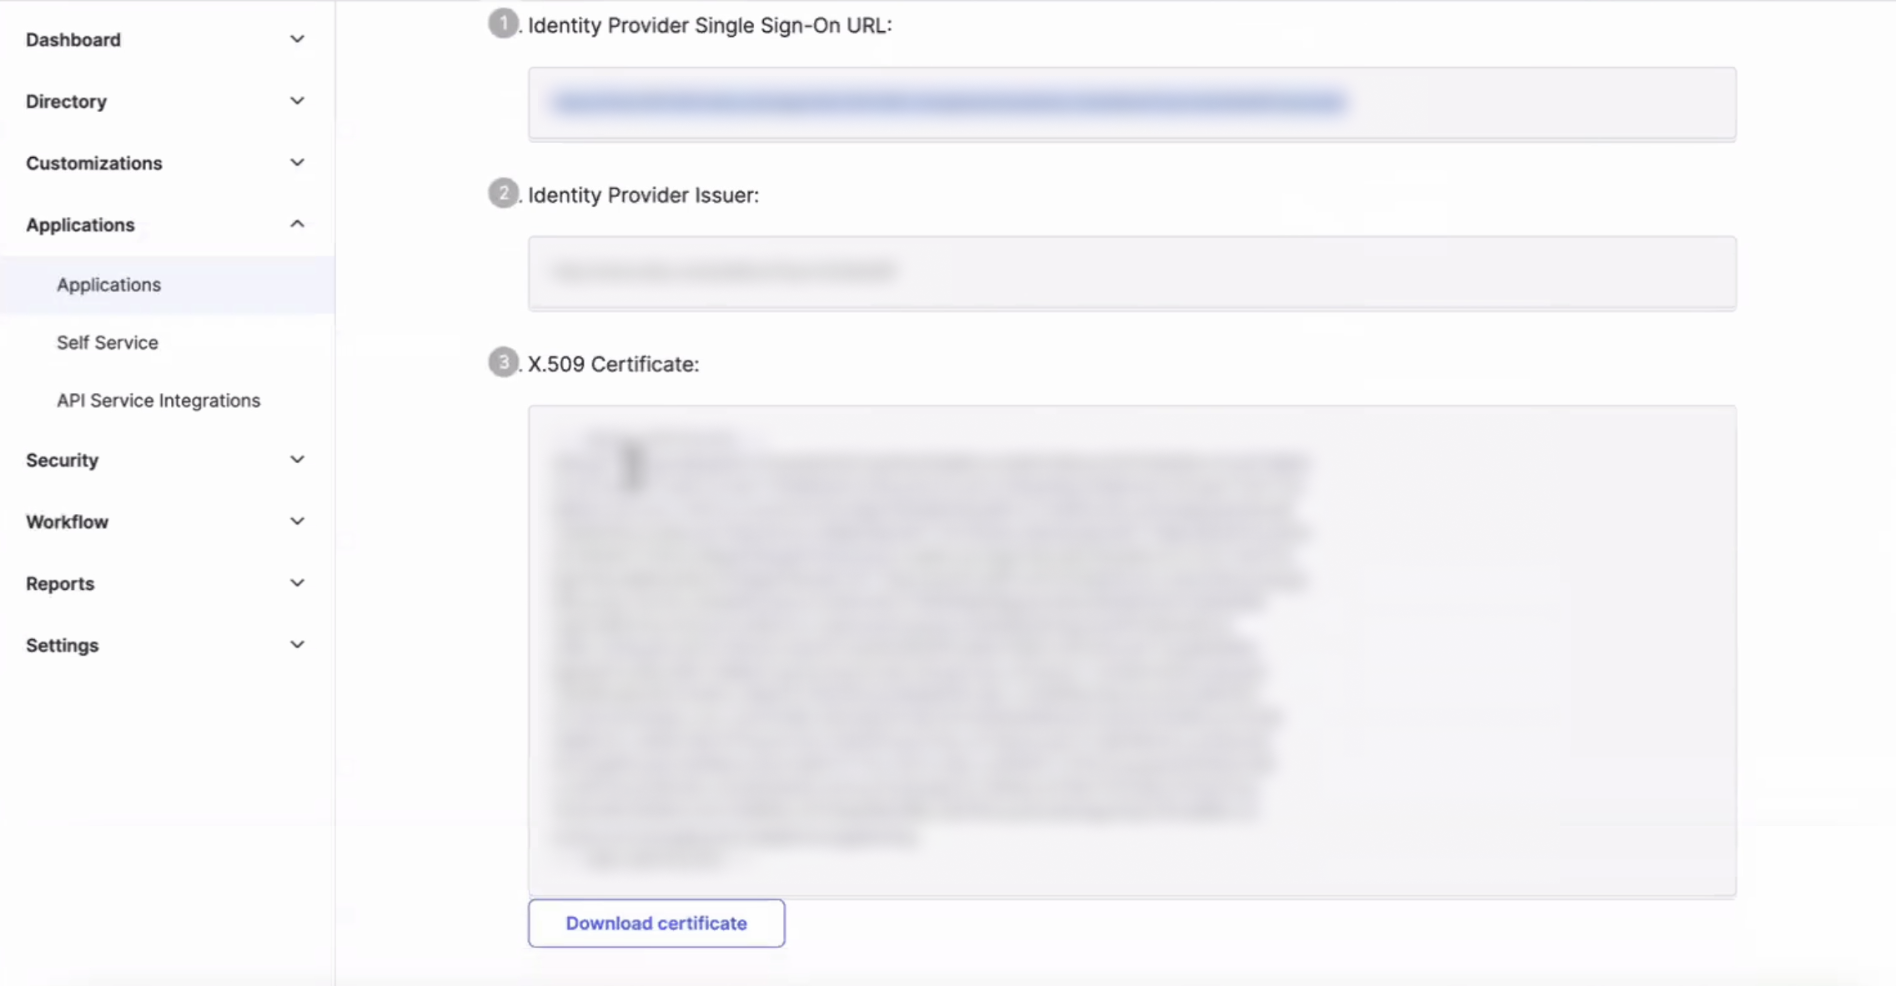
 You can find the SSO URL and download the certificate file here.
 4. Click **Confirm** to save the configuration.
5. After creation, a card with the SSO details will be added to the **SSO configuration** page. Use the `AscUrl` and `Entity ID` values from this card to fill the `IdP Single Sign-On URL` and `SP Entity ID / Issuer / Audience URI` fields on your IdP platform.
4. Click **Confirm** to save the configuration.
5. After creation, a card with the SSO details will be added to the **SSO configuration** page. Use the `AscUrl` and `Entity ID` values from this card to fill the `IdP Single Sign-On URL` and `SP Entity ID / Issuer / Audience URI` fields on your IdP platform.
 1. In the SAML application for RisingWave Cloud, select the **General** tab.
 2. Scroll down to the **SAML Settings** section and click **Edit**.
 3. Select the **Configure SAML** tab. Enter the `Single sign-on URL` and `Audience URI (SP Entity ID)` values with `AscUrl` and `Entity ID` on the SSO configuration card on RisingWave Cloud.
 4. Scroll down and click **Next**. Then, **Finish**.
6. Switch the toggle on the card to enable the SSO configuration for your organization.
## Logging in with SSO
Once SSO is configured for your organization, all users can log in to RisingWave Cloud using their work email addresses and SSO credentials.
**Steps:**
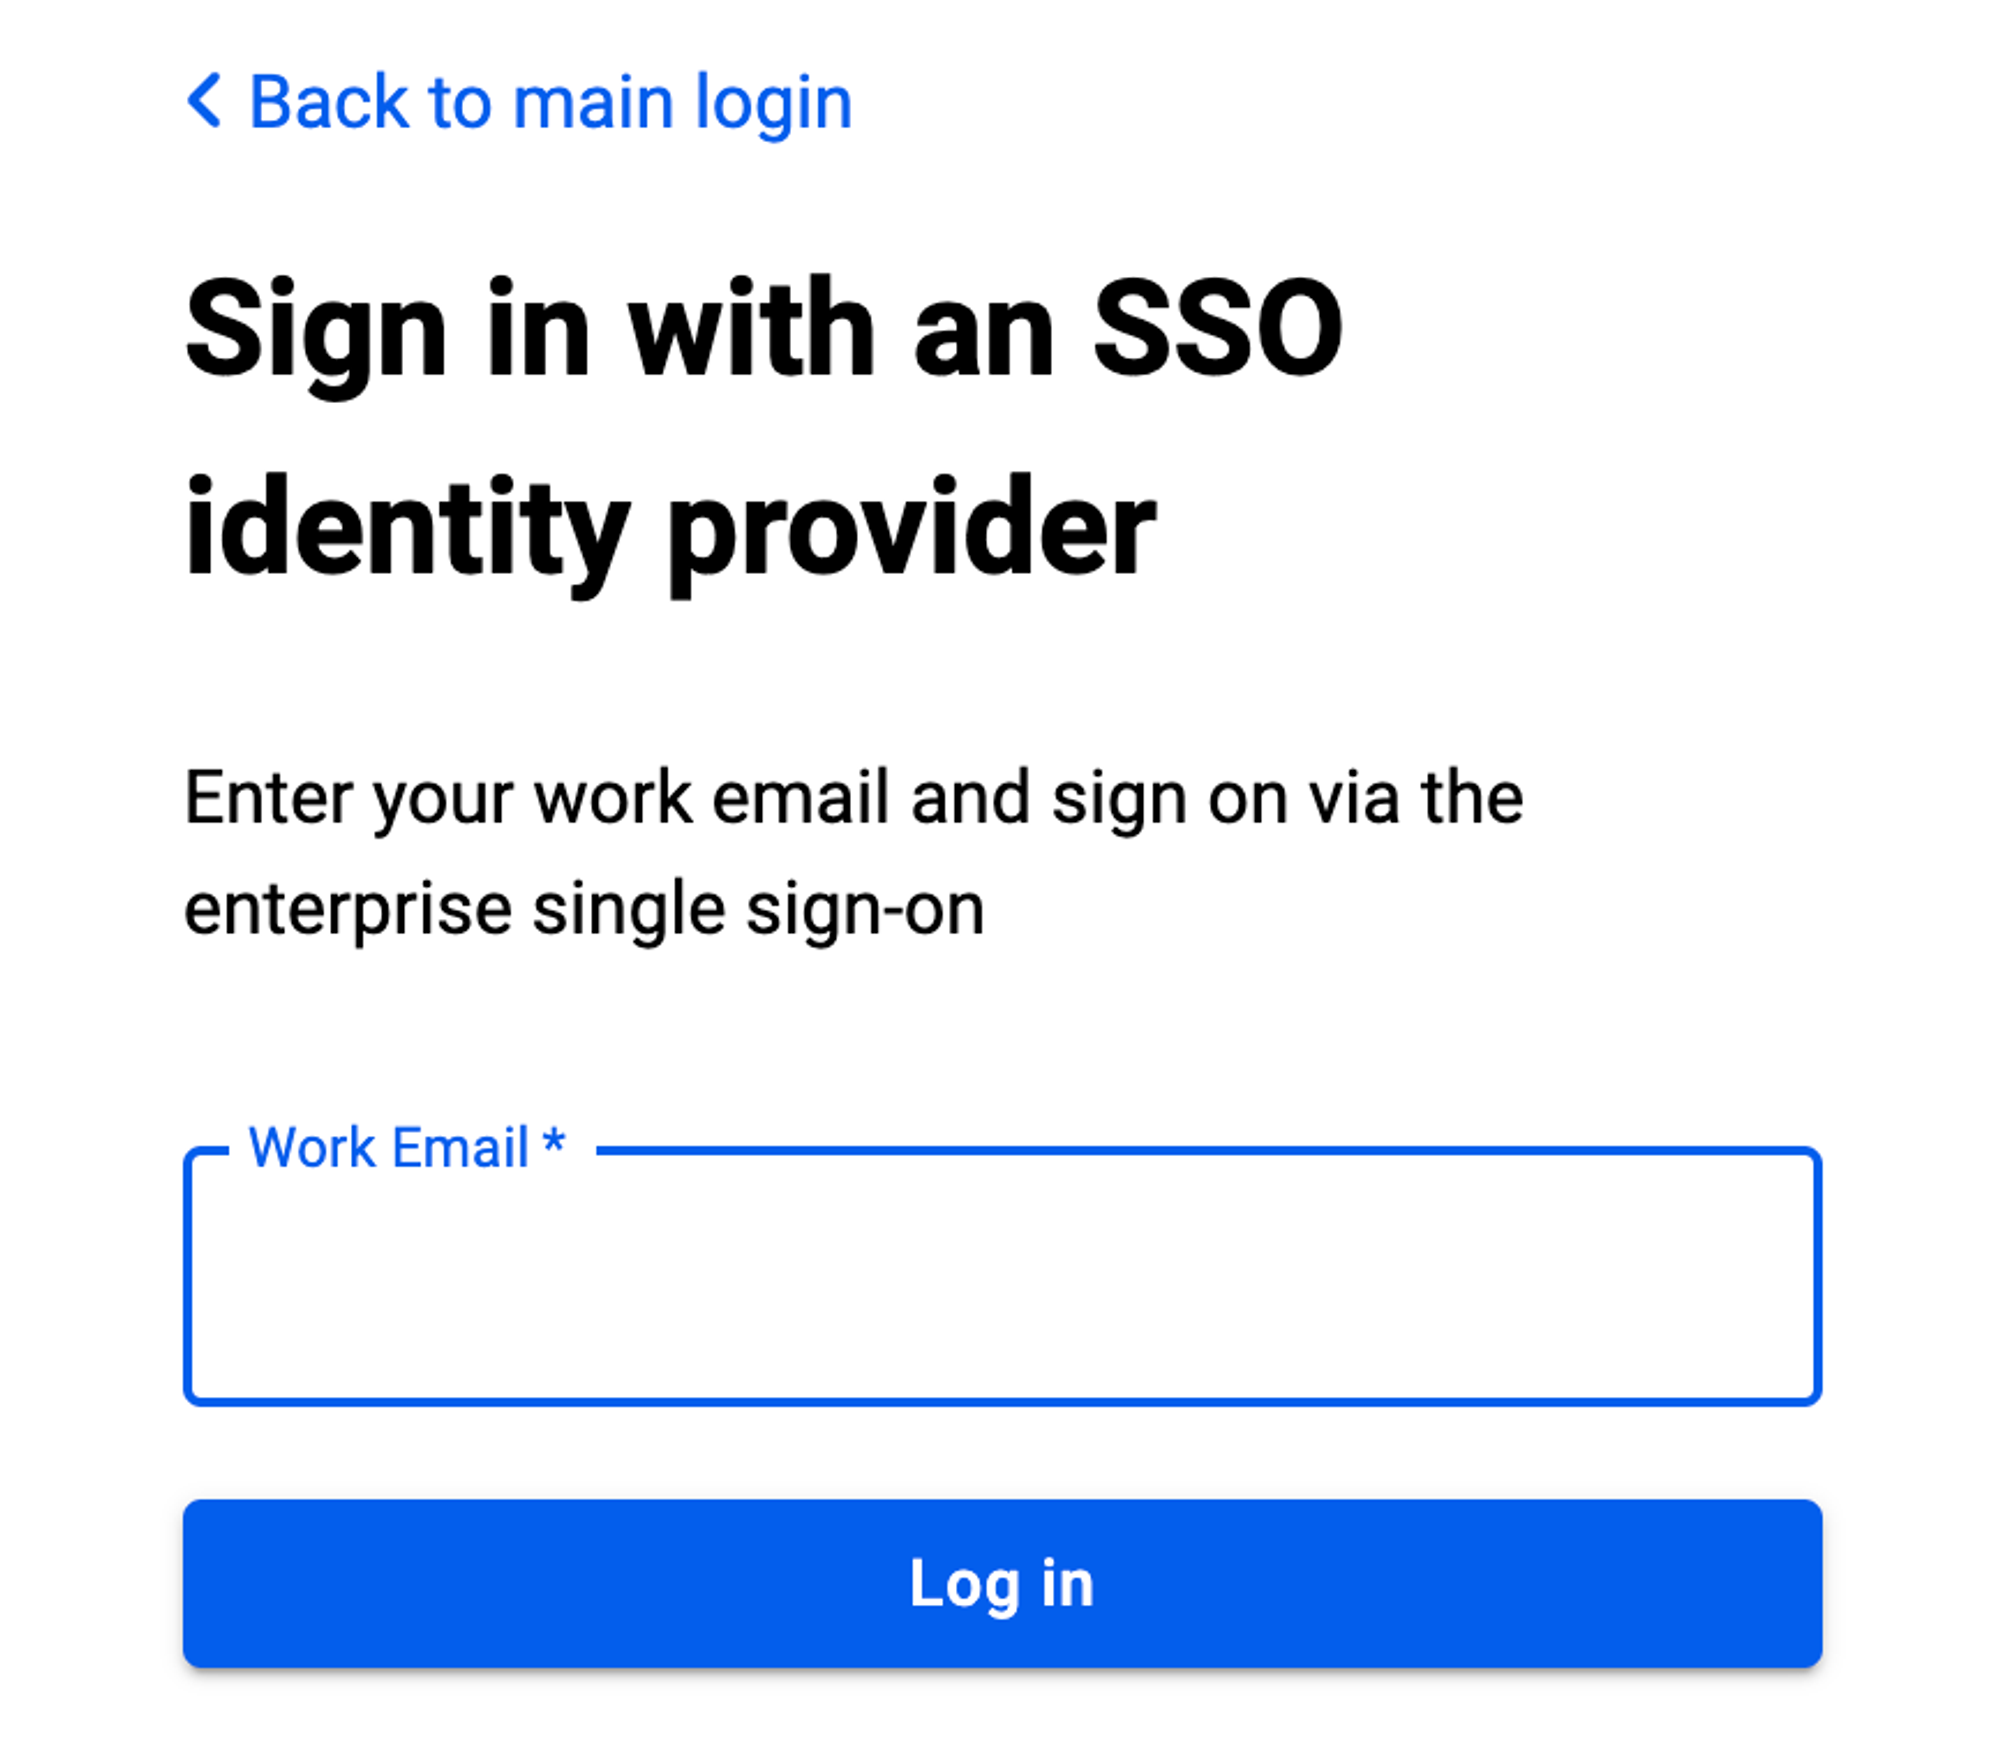
1. On the [login](https://cloud.risingwave.com/auth/signin/) page, click **Enterprise single sign-on**.
4. Scroll down and click **Next**. Then, **Finish**.
6. Switch the toggle on the card to enable the SSO configuration for your organization.
## Logging in with SSO
Once SSO is configured for your organization, all users can log in to RisingWave Cloud using their work email addresses and SSO credentials.
**Steps:**
1. On the [login](https://cloud.risingwave.com/auth/signin/) page, click **Enterprise single sign-on**.
 2. Enter your work email and click **Log in**.
 3. You'll be redirected to your IdP platform to complete the authentication process.