> ## Documentation Index
> Fetch the complete documentation index at: https://docs.risingwave.com/llms.txt
> Use this file to discover all available pages before exploring further.
# Ingest data from Confluent Cloud
> This guide will go over how to set up a Kafka cluster on Confluent Cloud so you can connect and read data from it with RisingWave. See [Confluent](https://www.confluent.io) for more details and how to get started.
## Set up Kafka on Confluent Cloud
### Create a Kafka cluster
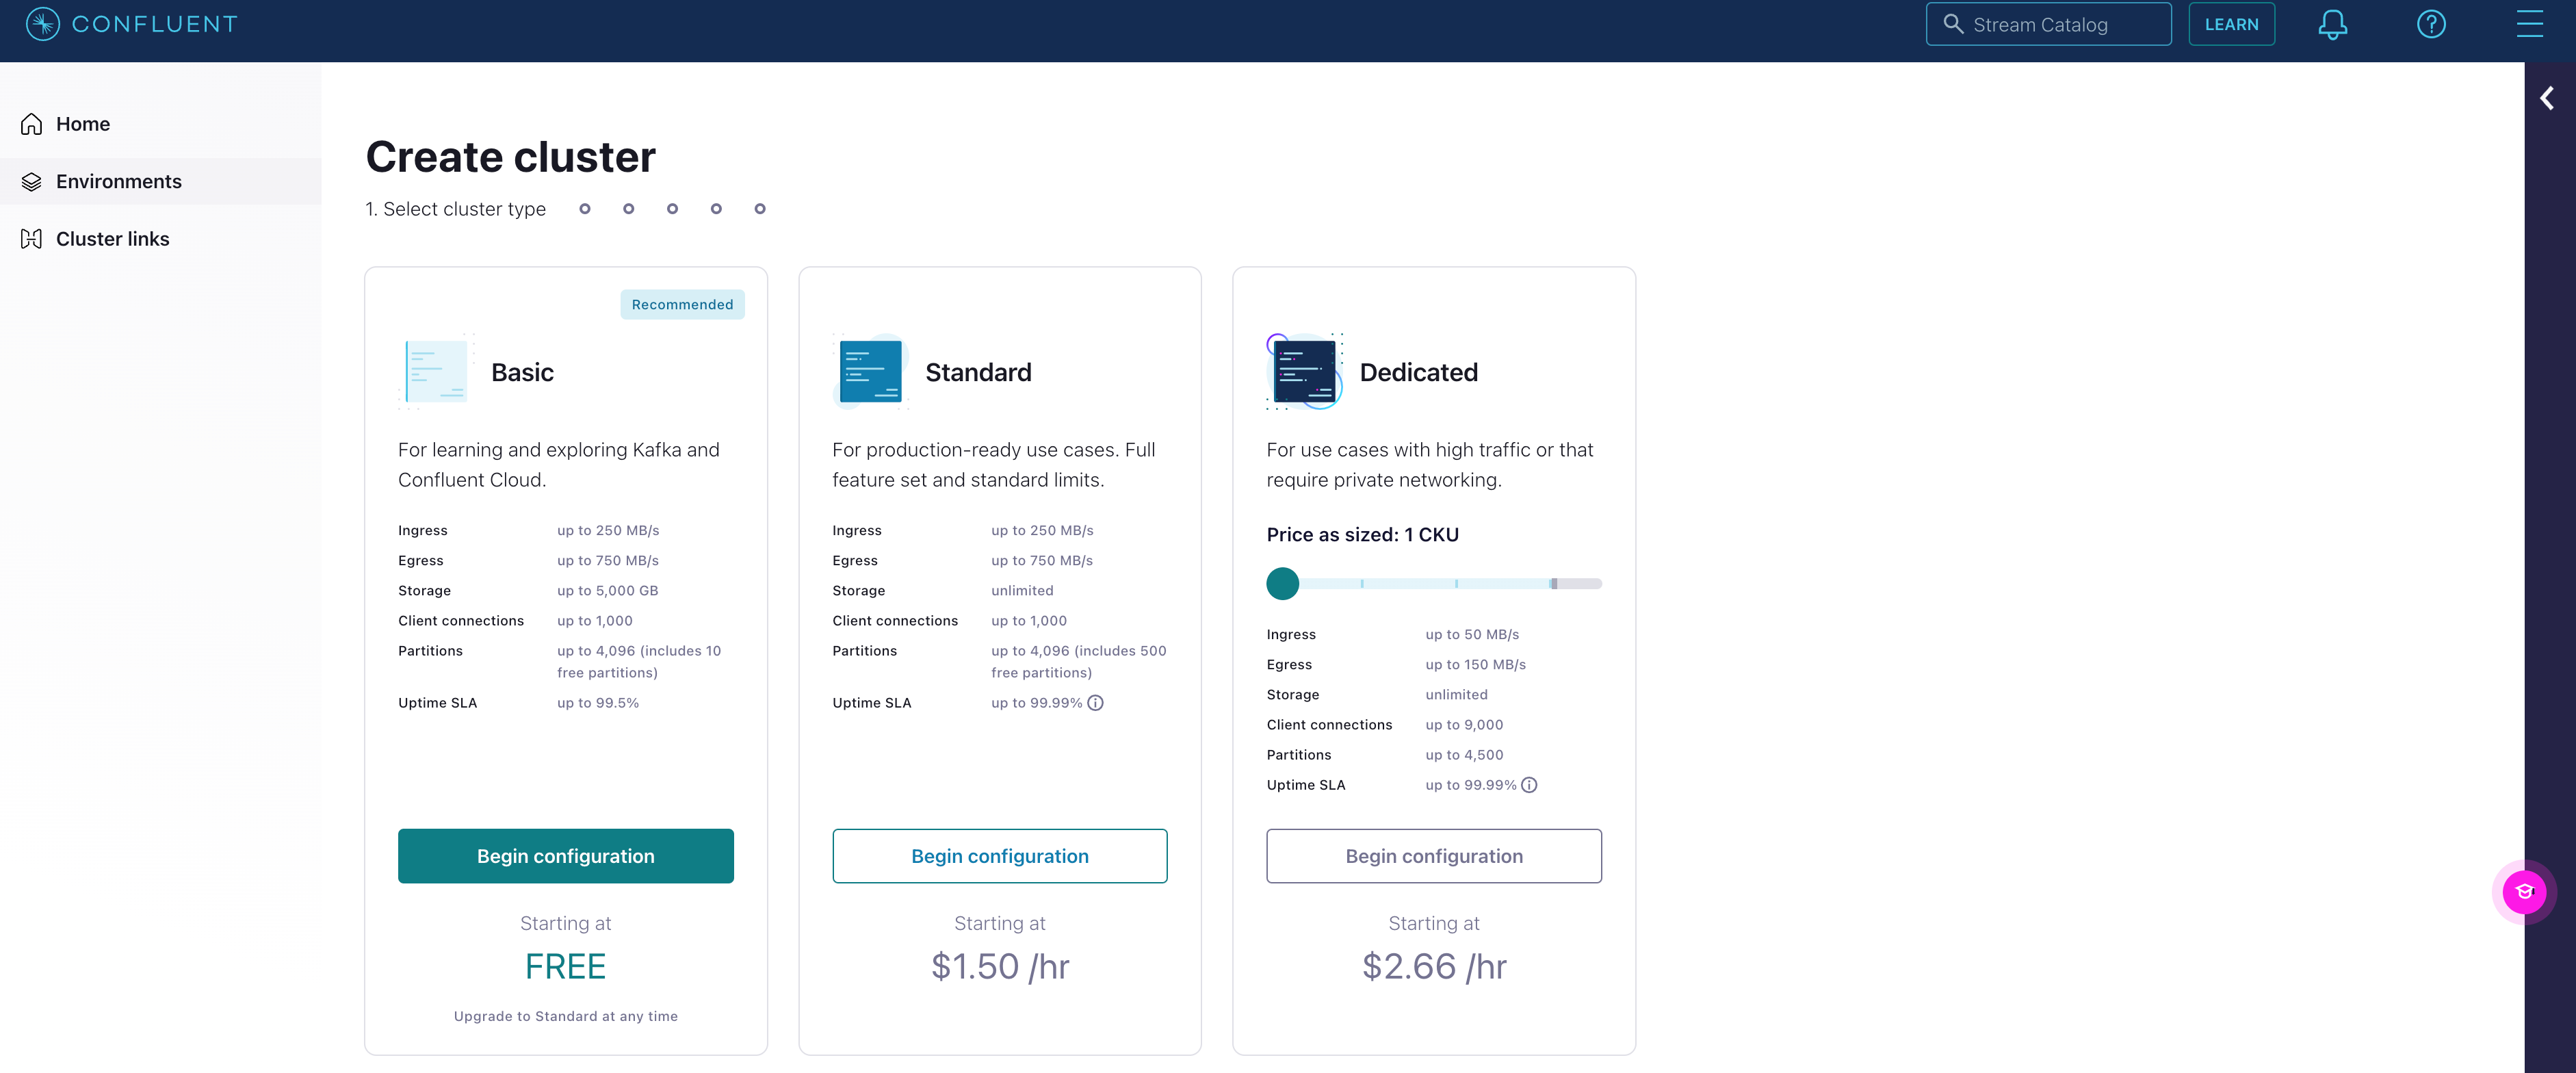
1. Create a new cluster. Click on **Begin configuration** under the appropriate cluster type.
 2. Select **AWS** and the appropriate **Region** and **Availability**. Click **Continue**.
3. Name the cluster accordingly. Click **Launch cluster**.
### Produce sample data
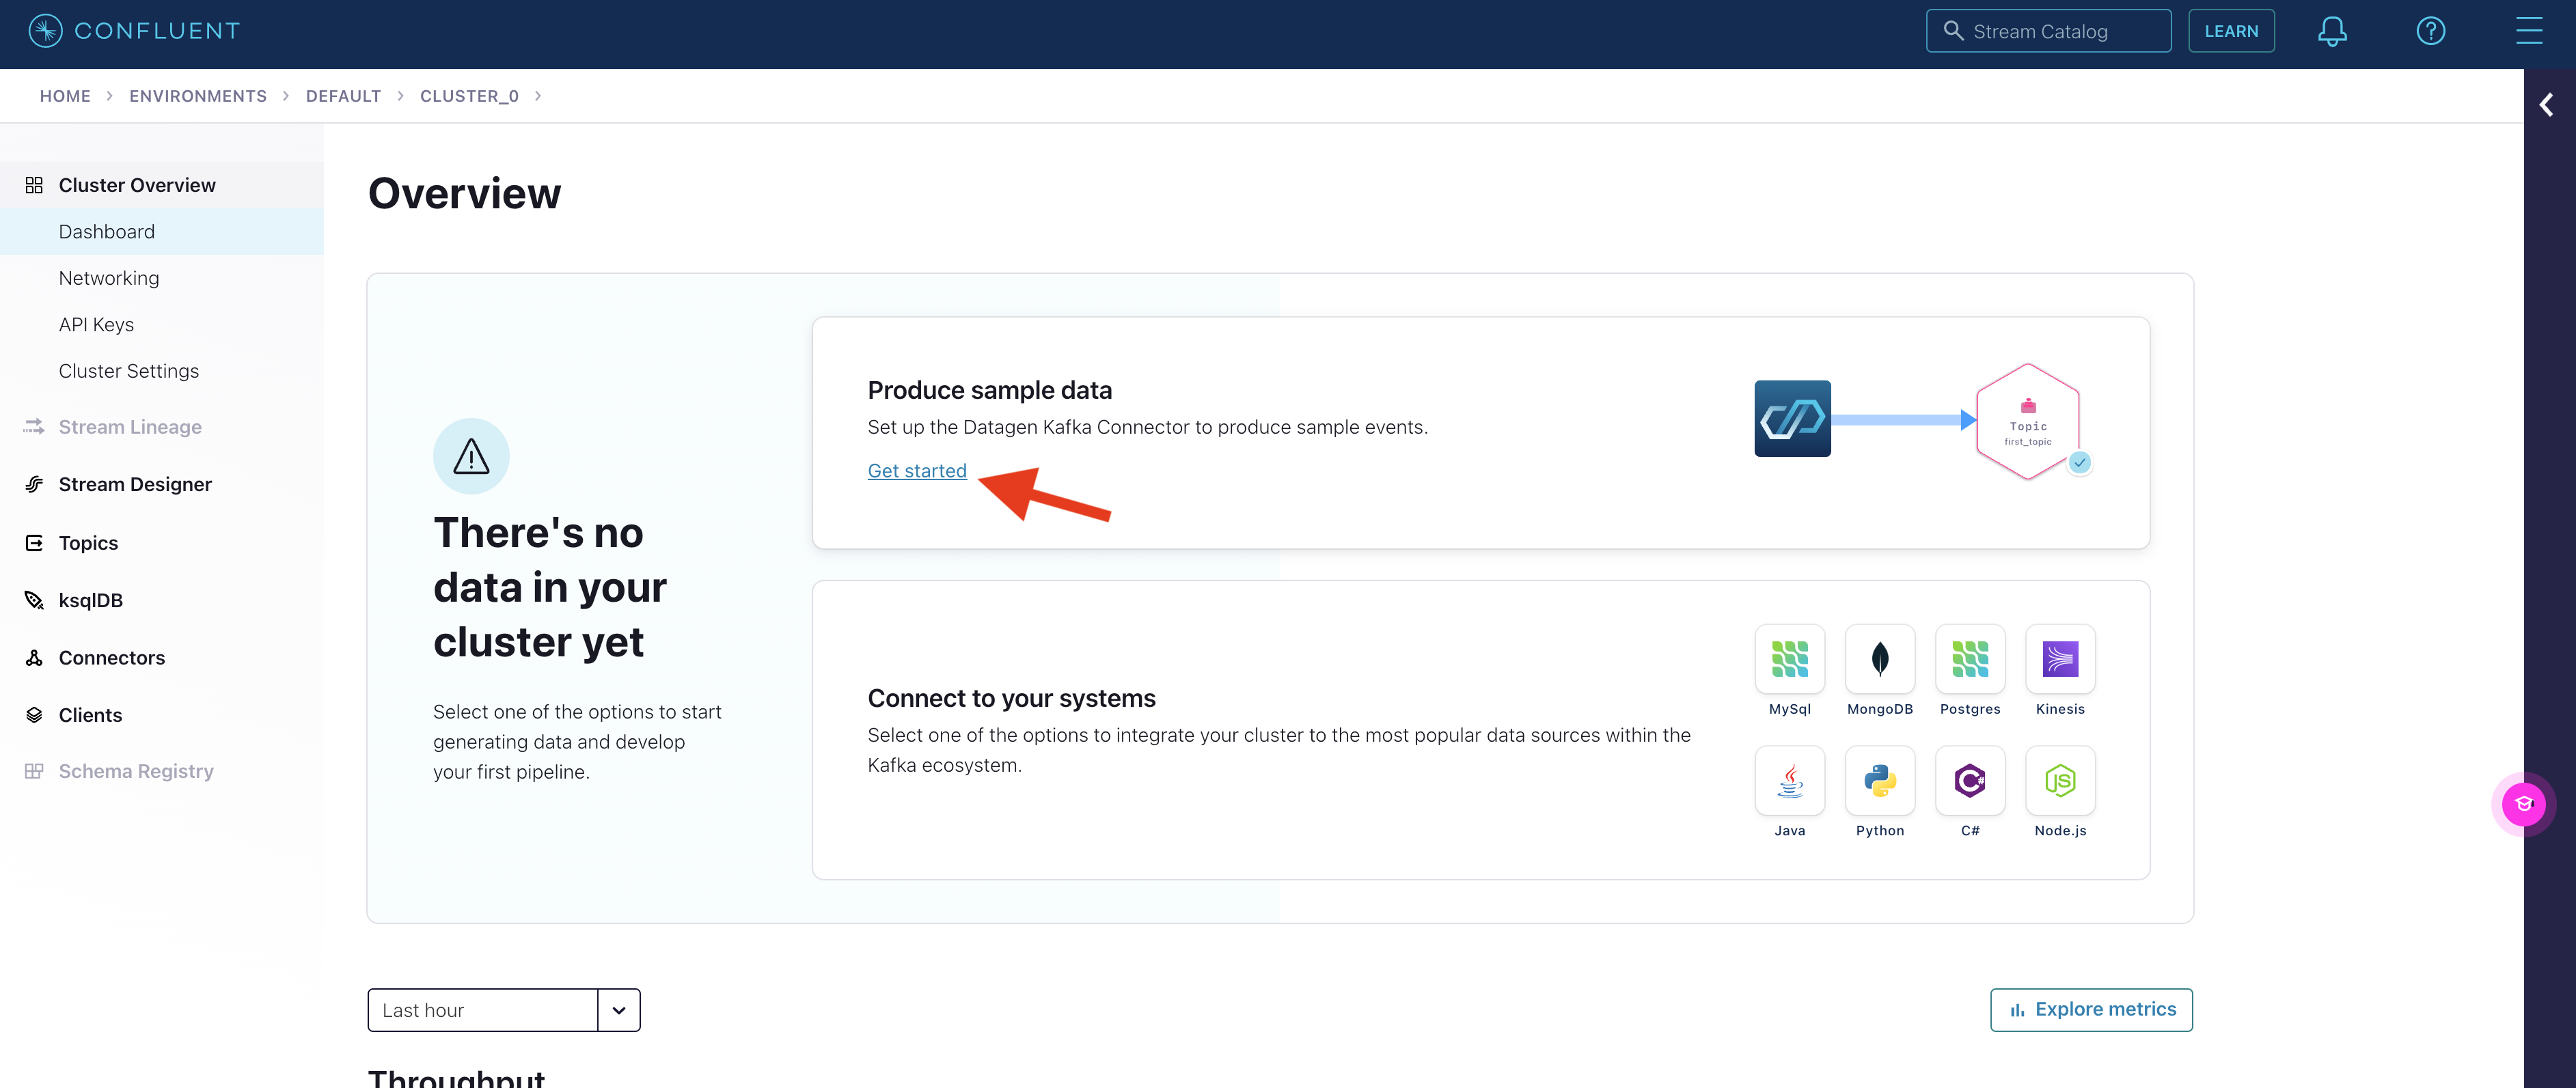
1. Under **Cluster overview > Dashboard**, select **Get started** under **Produce sample data**.
2. Select **AWS** and the appropriate **Region** and **Availability**. Click **Continue**.
3. Name the cluster accordingly. Click **Launch cluster**.
### Produce sample data
1. Under **Cluster overview > Dashboard**, select **Get started** under **Produce sample data**.
 2. Click **Add a new topic**.
3. Name the topic and input the number of partitions.
4. Click **Create with defaults**.
5. In the **Add datagen source connector** page, select the topic just made, and click **Continue**.
6. Click on **Generate API key & download** to generate the credentials. Click **Continue**.
7. Select the preferred output format and template. For this guide, we will be using **JSON** and **Orders**. Click **Continue**.
8. Adjust the connector sizing if applicable. Otherwise, leave it at one. Click **Continue**.
Now the source connector is created.
## Connect RisingWave to Confluent Cloud
### Create an API key
1. Select the Confluent Cloud Kafka cluster you just create from the dashboard.
2. Click the **API Keys** tab.
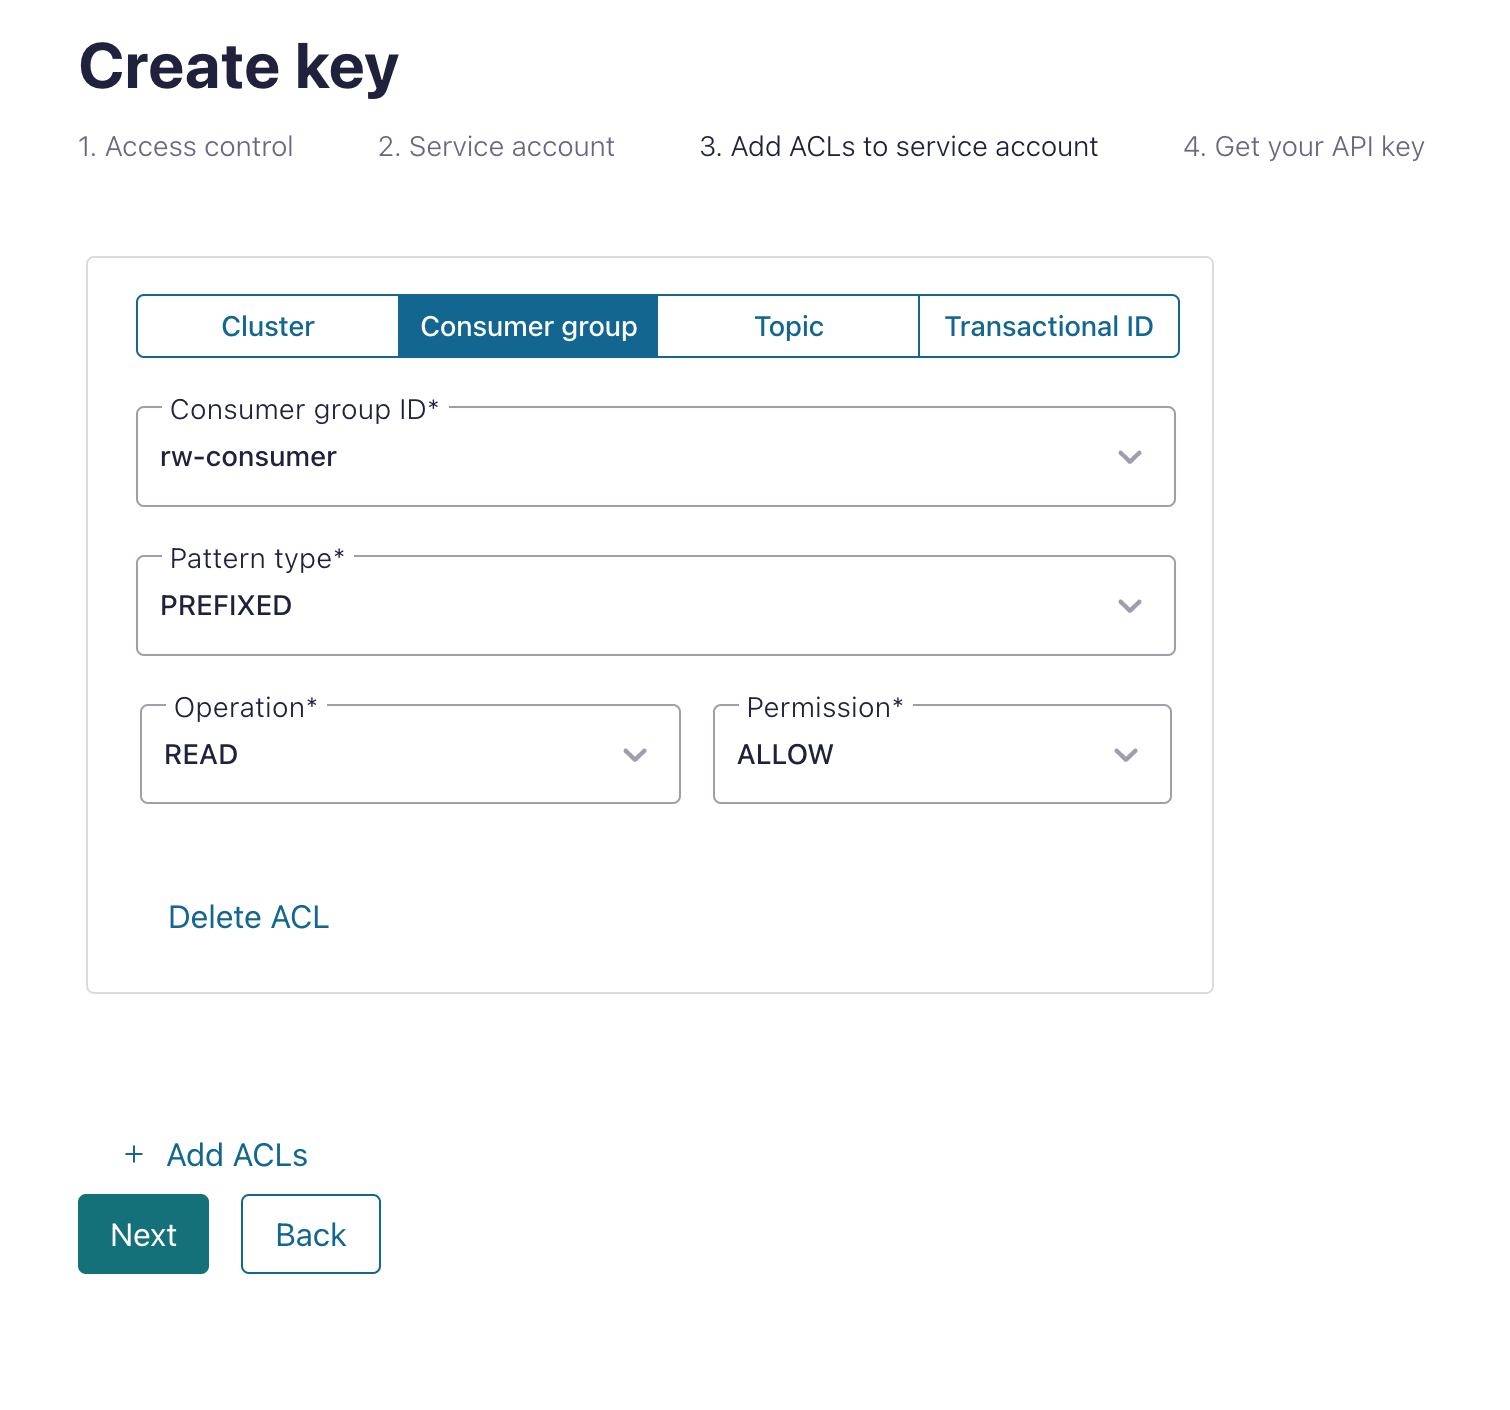
3. Add a new **service account** API key for the cluster you just created, and set up the ACL to allow READ operation for consumer groups with `rw-consumer` (aligned with `group.id.prefix` in the WITH clause).
2. Click **Add a new topic**.
3. Name the topic and input the number of partitions.
4. Click **Create with defaults**.
5. In the **Add datagen source connector** page, select the topic just made, and click **Continue**.
6. Click on **Generate API key & download** to generate the credentials. Click **Continue**.
7. Select the preferred output format and template. For this guide, we will be using **JSON** and **Orders**. Click **Continue**.
8. Adjust the connector sizing if applicable. Otherwise, leave it at one. Click **Continue**.
Now the source connector is created.
## Connect RisingWave to Confluent Cloud
### Create an API key
1. Select the Confluent Cloud Kafka cluster you just create from the dashboard.
2. Click the **API Keys** tab.
3. Add a new **service account** API key for the cluster you just created, and set up the ACL to allow READ operation for consumer groups with `rw-consumer` (aligned with `group.id.prefix` in the WITH clause).
 Note that you will need the API key when creating a Kafka source in RisingWave.
### Run RisingWave
To start RisingWave, see the [Get started](/get-started/quickstart) guide.
### Connect to the data stream
Create a table in RisingWave to ingest data from the Kafka topic created in Confluent Cloud.
The following query will create a table that connects to the data generator created in Confluent. Remember to fill in the authentication parameters accordingly.
See the [Ingest data from Kafka](/integrations/sources/kafka) topic for more details on the syntax and connection parameters.
```sql theme={null}
CREATE TABLE s (
ordertime timestamp,
orderid int,
itemid varchar,
orderunits double,
address STRUCT < city varchar,
state varchar,
zipcode int >
) WITH (
connector = 'kafka',
topic = 'topic_0',
properties.bootstrap.server = 'xyz-x00xx.us-east-1.aws.confluent.cloud:9092',
scan.startup.mode = 'earliest',
properties.security.protocol = 'SASL_SSL',
properties.sasl.mechanism = 'PLAIN',
properties.sasl.username = 'username',
properties.sasl.password = 'password'
) FORMAT PLAIN ENCODE JSON;
```
We can query from the table to see the data.
```sql theme={null}
SELECT * FROM s LIMIT 10 ;
ordertime | orderid | itemid | orderunits | address
-------------------------+---------+----------+---------------------+--------------------------
2017-07-11 13:10:57.470 | 69 | Item_923 | 0.34482867789025445 | (City_,State_12,79507)
2017-12-20 04:28:50.333 | 165 | Item_749 | 1.8283880900442675 | (City_,State_,29429)
2017-10-17 08:54:29.206 | 241 | Item_492 | 9.023949081036958 | (City_,State_6,59279)
2017-04-09 08:46:59.978 | 314 | Item_722 | 7.759774352468652 | (City_16,State_,39963)
2018-01-30 01:37:27.704 | 415 | Item_5 | 0.5213453497103845 | (City_8,State_7,12423)
2017-10-17 21:10:28.110 | 567 | Item_509 | 2.7527961549251914 | (City_16,State_8,82637)
2017-09-04 10:13:37.337 | 650 | Item_196 | 9.7117407038982 | (City_,State_,79763)
2018-02-18 13:08:11.272 | 696 | Item_541 | 1.389311132296164 | (City_2,State_87,55001)
2017-07-26 12:24:49.116 | 874 | Item_7 | 5.914994867745335 | (City_9,State_3,55552)
2017-10-17 20:06:57.658 | 912 | Item_3 | 8.24318992907263 | (City_73,State_96,62568)
(10 rows)
```
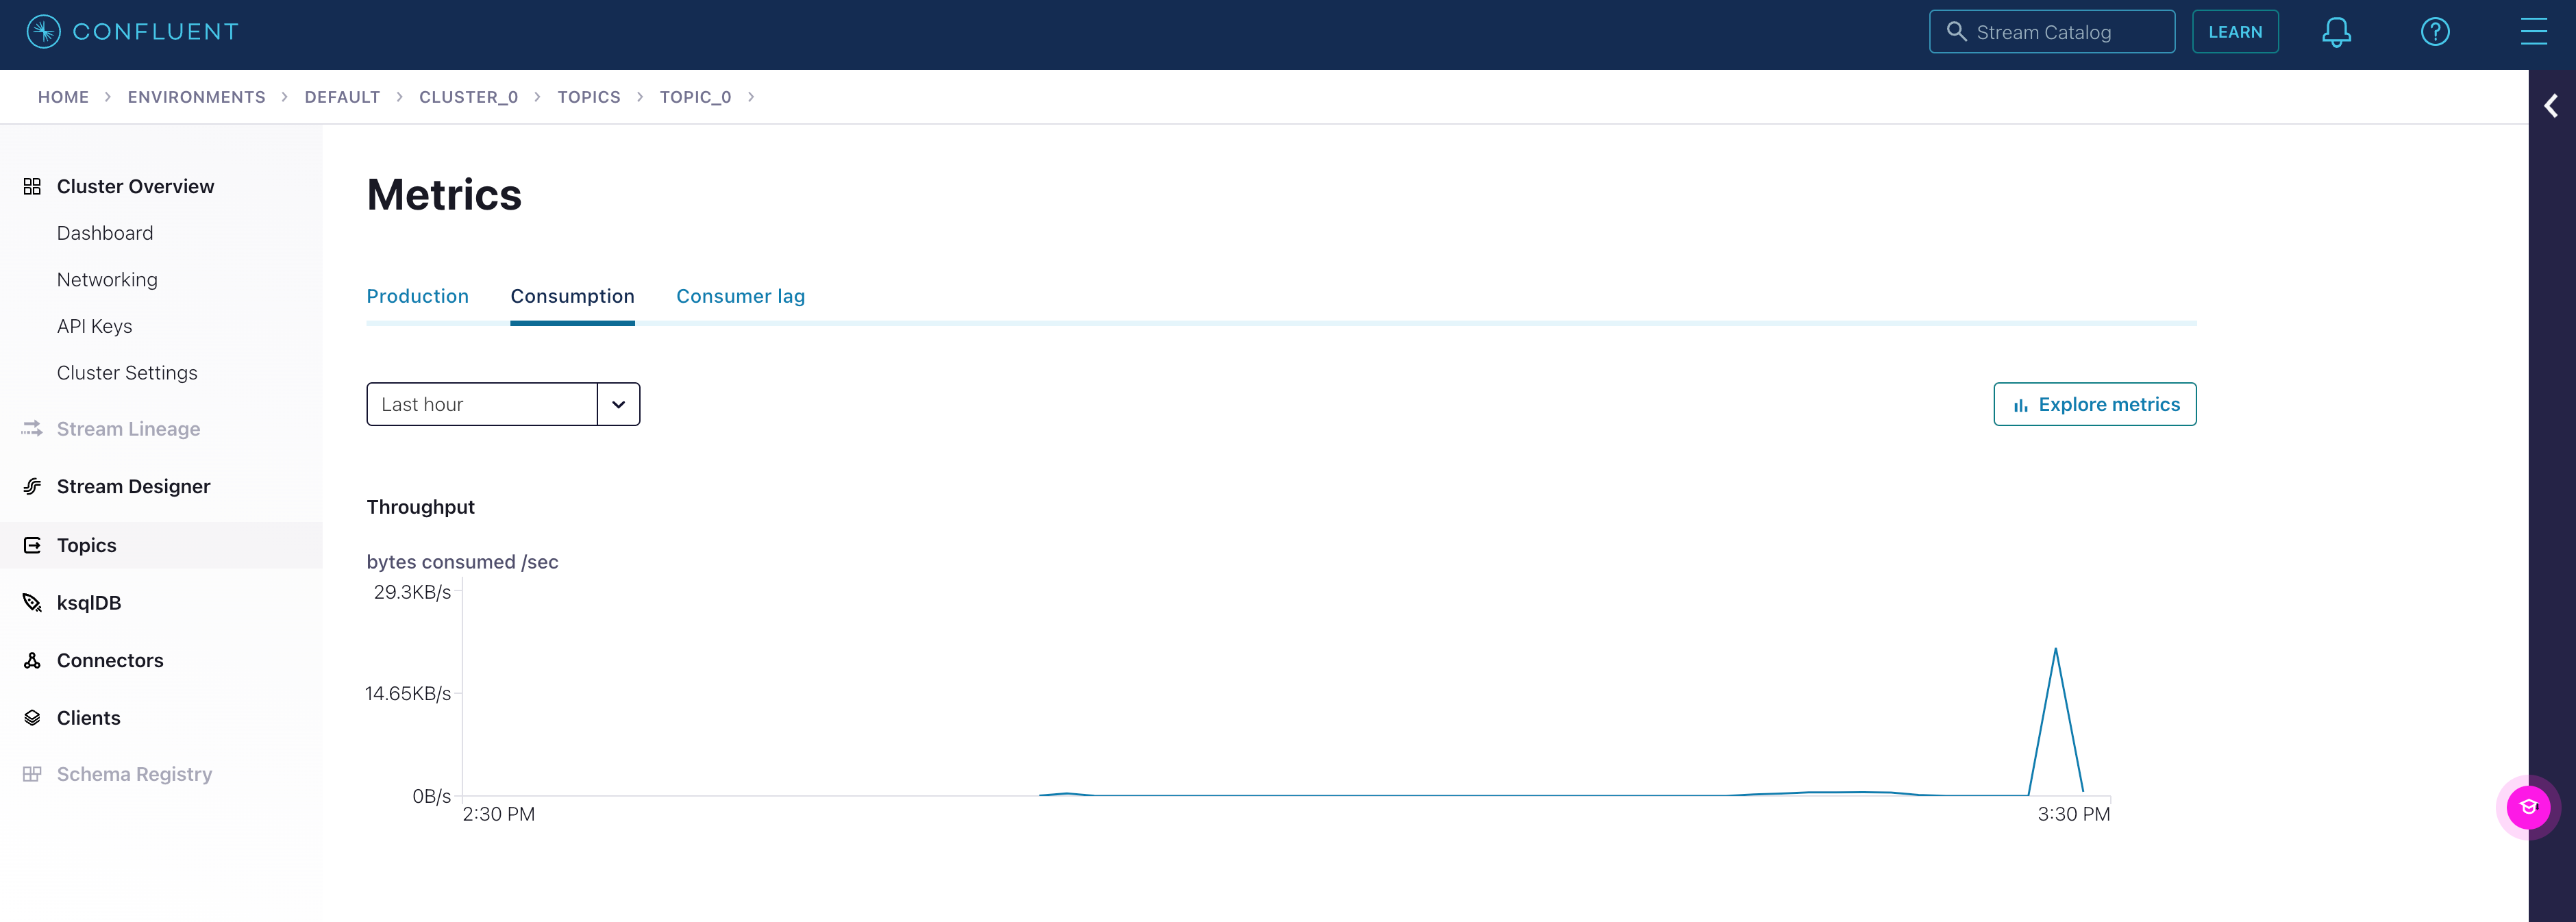
We can also check the consumption progress on Confluent by click on **Topics** from the sidebar, selecting the topic we just created, and clicking on **Consumption**.
Note that you will need the API key when creating a Kafka source in RisingWave.
### Run RisingWave
To start RisingWave, see the [Get started](/get-started/quickstart) guide.
### Connect to the data stream
Create a table in RisingWave to ingest data from the Kafka topic created in Confluent Cloud.
The following query will create a table that connects to the data generator created in Confluent. Remember to fill in the authentication parameters accordingly.
See the [Ingest data from Kafka](/integrations/sources/kafka) topic for more details on the syntax and connection parameters.
```sql theme={null}
CREATE TABLE s (
ordertime timestamp,
orderid int,
itemid varchar,
orderunits double,
address STRUCT < city varchar,
state varchar,
zipcode int >
) WITH (
connector = 'kafka',
topic = 'topic_0',
properties.bootstrap.server = 'xyz-x00xx.us-east-1.aws.confluent.cloud:9092',
scan.startup.mode = 'earliest',
properties.security.protocol = 'SASL_SSL',
properties.sasl.mechanism = 'PLAIN',
properties.sasl.username = 'username',
properties.sasl.password = 'password'
) FORMAT PLAIN ENCODE JSON;
```
We can query from the table to see the data.
```sql theme={null}
SELECT * FROM s LIMIT 10 ;
ordertime | orderid | itemid | orderunits | address
-------------------------+---------+----------+---------------------+--------------------------
2017-07-11 13:10:57.470 | 69 | Item_923 | 0.34482867789025445 | (City_,State_12,79507)
2017-12-20 04:28:50.333 | 165 | Item_749 | 1.8283880900442675 | (City_,State_,29429)
2017-10-17 08:54:29.206 | 241 | Item_492 | 9.023949081036958 | (City_,State_6,59279)
2017-04-09 08:46:59.978 | 314 | Item_722 | 7.759774352468652 | (City_16,State_,39963)
2018-01-30 01:37:27.704 | 415 | Item_5 | 0.5213453497103845 | (City_8,State_7,12423)
2017-10-17 21:10:28.110 | 567 | Item_509 | 2.7527961549251914 | (City_16,State_8,82637)
2017-09-04 10:13:37.337 | 650 | Item_196 | 9.7117407038982 | (City_,State_,79763)
2018-02-18 13:08:11.272 | 696 | Item_541 | 1.389311132296164 | (City_2,State_87,55001)
2017-07-26 12:24:49.116 | 874 | Item_7 | 5.914994867745335 | (City_9,State_3,55552)
2017-10-17 20:06:57.658 | 912 | Item_3 | 8.24318992907263 | (City_73,State_96,62568)
(10 rows)
```
We can also check the consumption progress on Confluent by click on **Topics** from the sidebar, selecting the topic we just created, and clicking on **Consumption**.