If you are running self-hosted RisingWave (Operator/Helm/bare metal), use Ingest data from webhook.
For low-latency streaming ingestion over a persistent connection, see Ingest data from WebSocket.
How managed webhook routing works
In managed RisingWave Cloud, webhook requests are accepted by RWProxy over HTTPS and forwarded to your project’s frontend webhook listener.- Public ingress: HTTPS
:443 - Webhook path format:
/webhook/<database>/<schema>/<table>
- Hosted projects: SNI hostname first, then
tenantquery parameter fallback. - BYOC projects: currently use
tenantquery parameter (SNI is not supported).
Prerequisites
- A running RisingWave Cloud project.
- The tenant identifier of your project (for example,
rwc-g1huxxxxxx-mycluster). - A webhook table in your target database/schema (you can create it in the wizard).
Hosted vs BYOC requirements
| Project type | Tenant routing requirement | TLS note |
|---|---|---|
| Hosted | Use the webhook endpoint generated by the wizard. Hosted projects support SNI routing, with query-parameter fallback. | Use standard TLS verification. |
| BYOC | Use the webhook endpoint generated by the wizard, which includes ?tenant=<tenant identifier>. BYOC currently does not support SNI routing. | TLS verification can fail in some BYOC environments. For testing, use curl -k (or client equivalent). |
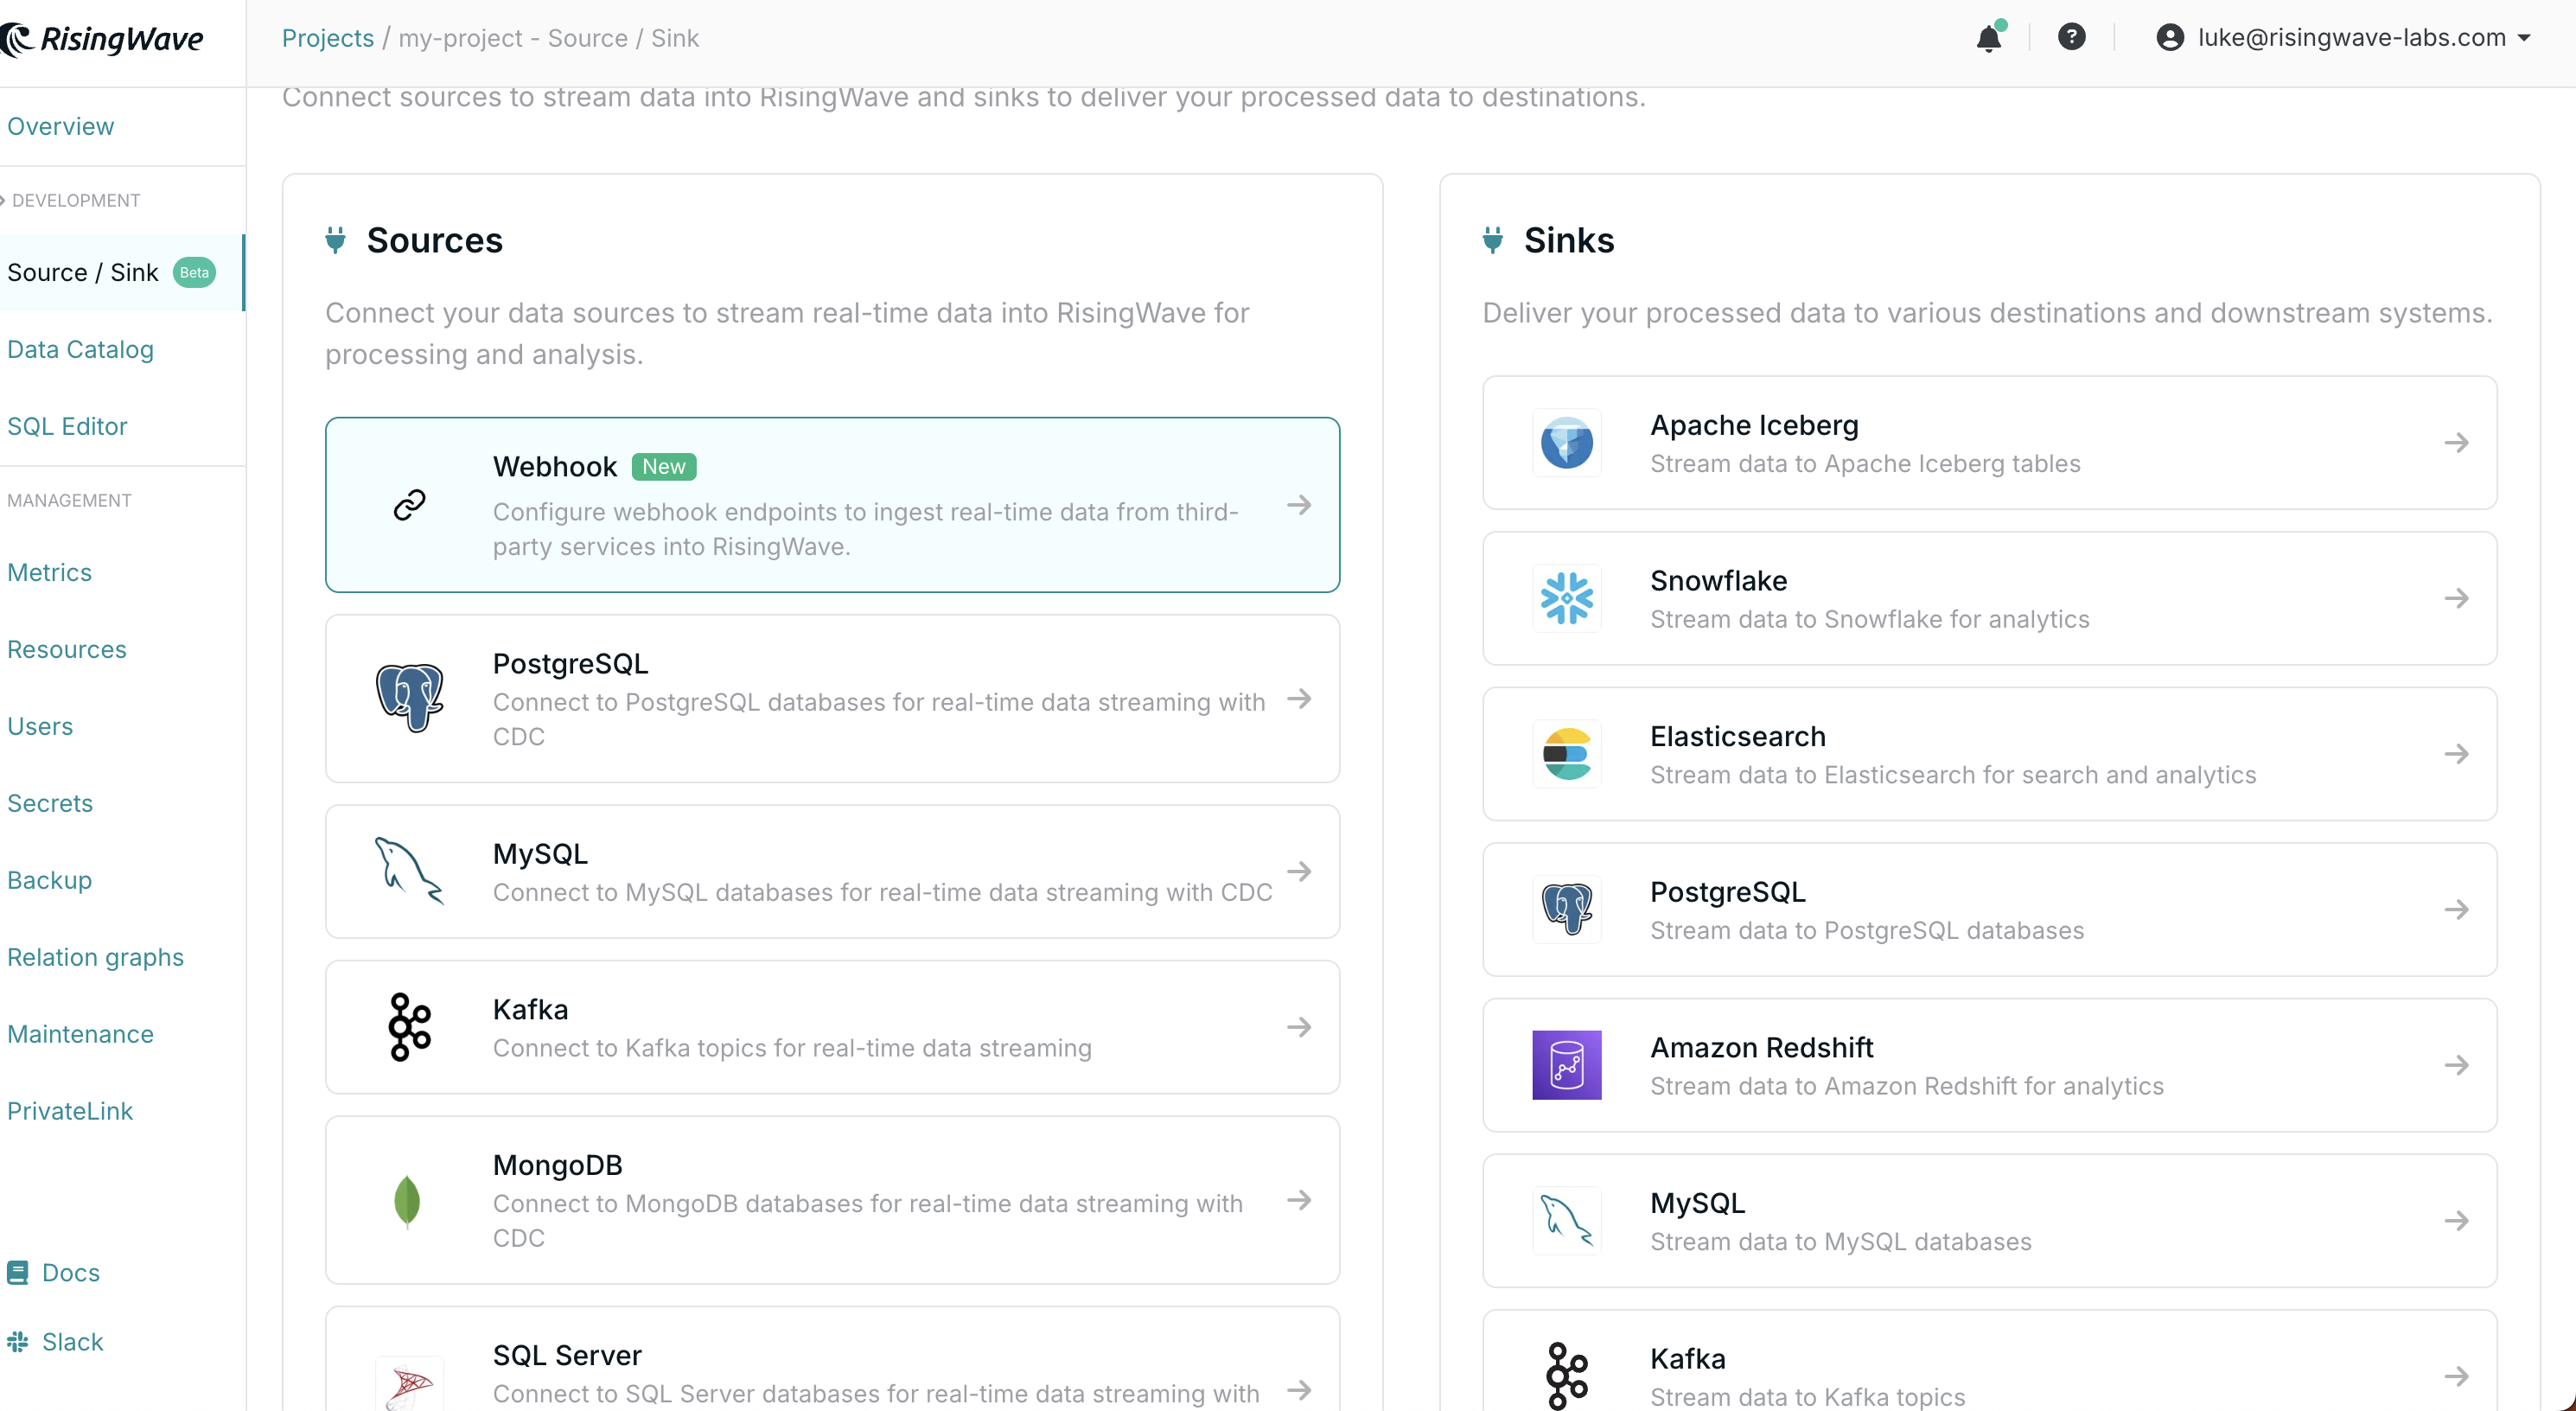
Use the Cloud Portal webhook wizard (recommended)
Use the wizard as the primary setup path so users do not need to manually construct hostnames or endpoint URLs. Wizard steps:- Open your project workspace and go to Connect Your Data.
- Open Webhook Configuration.
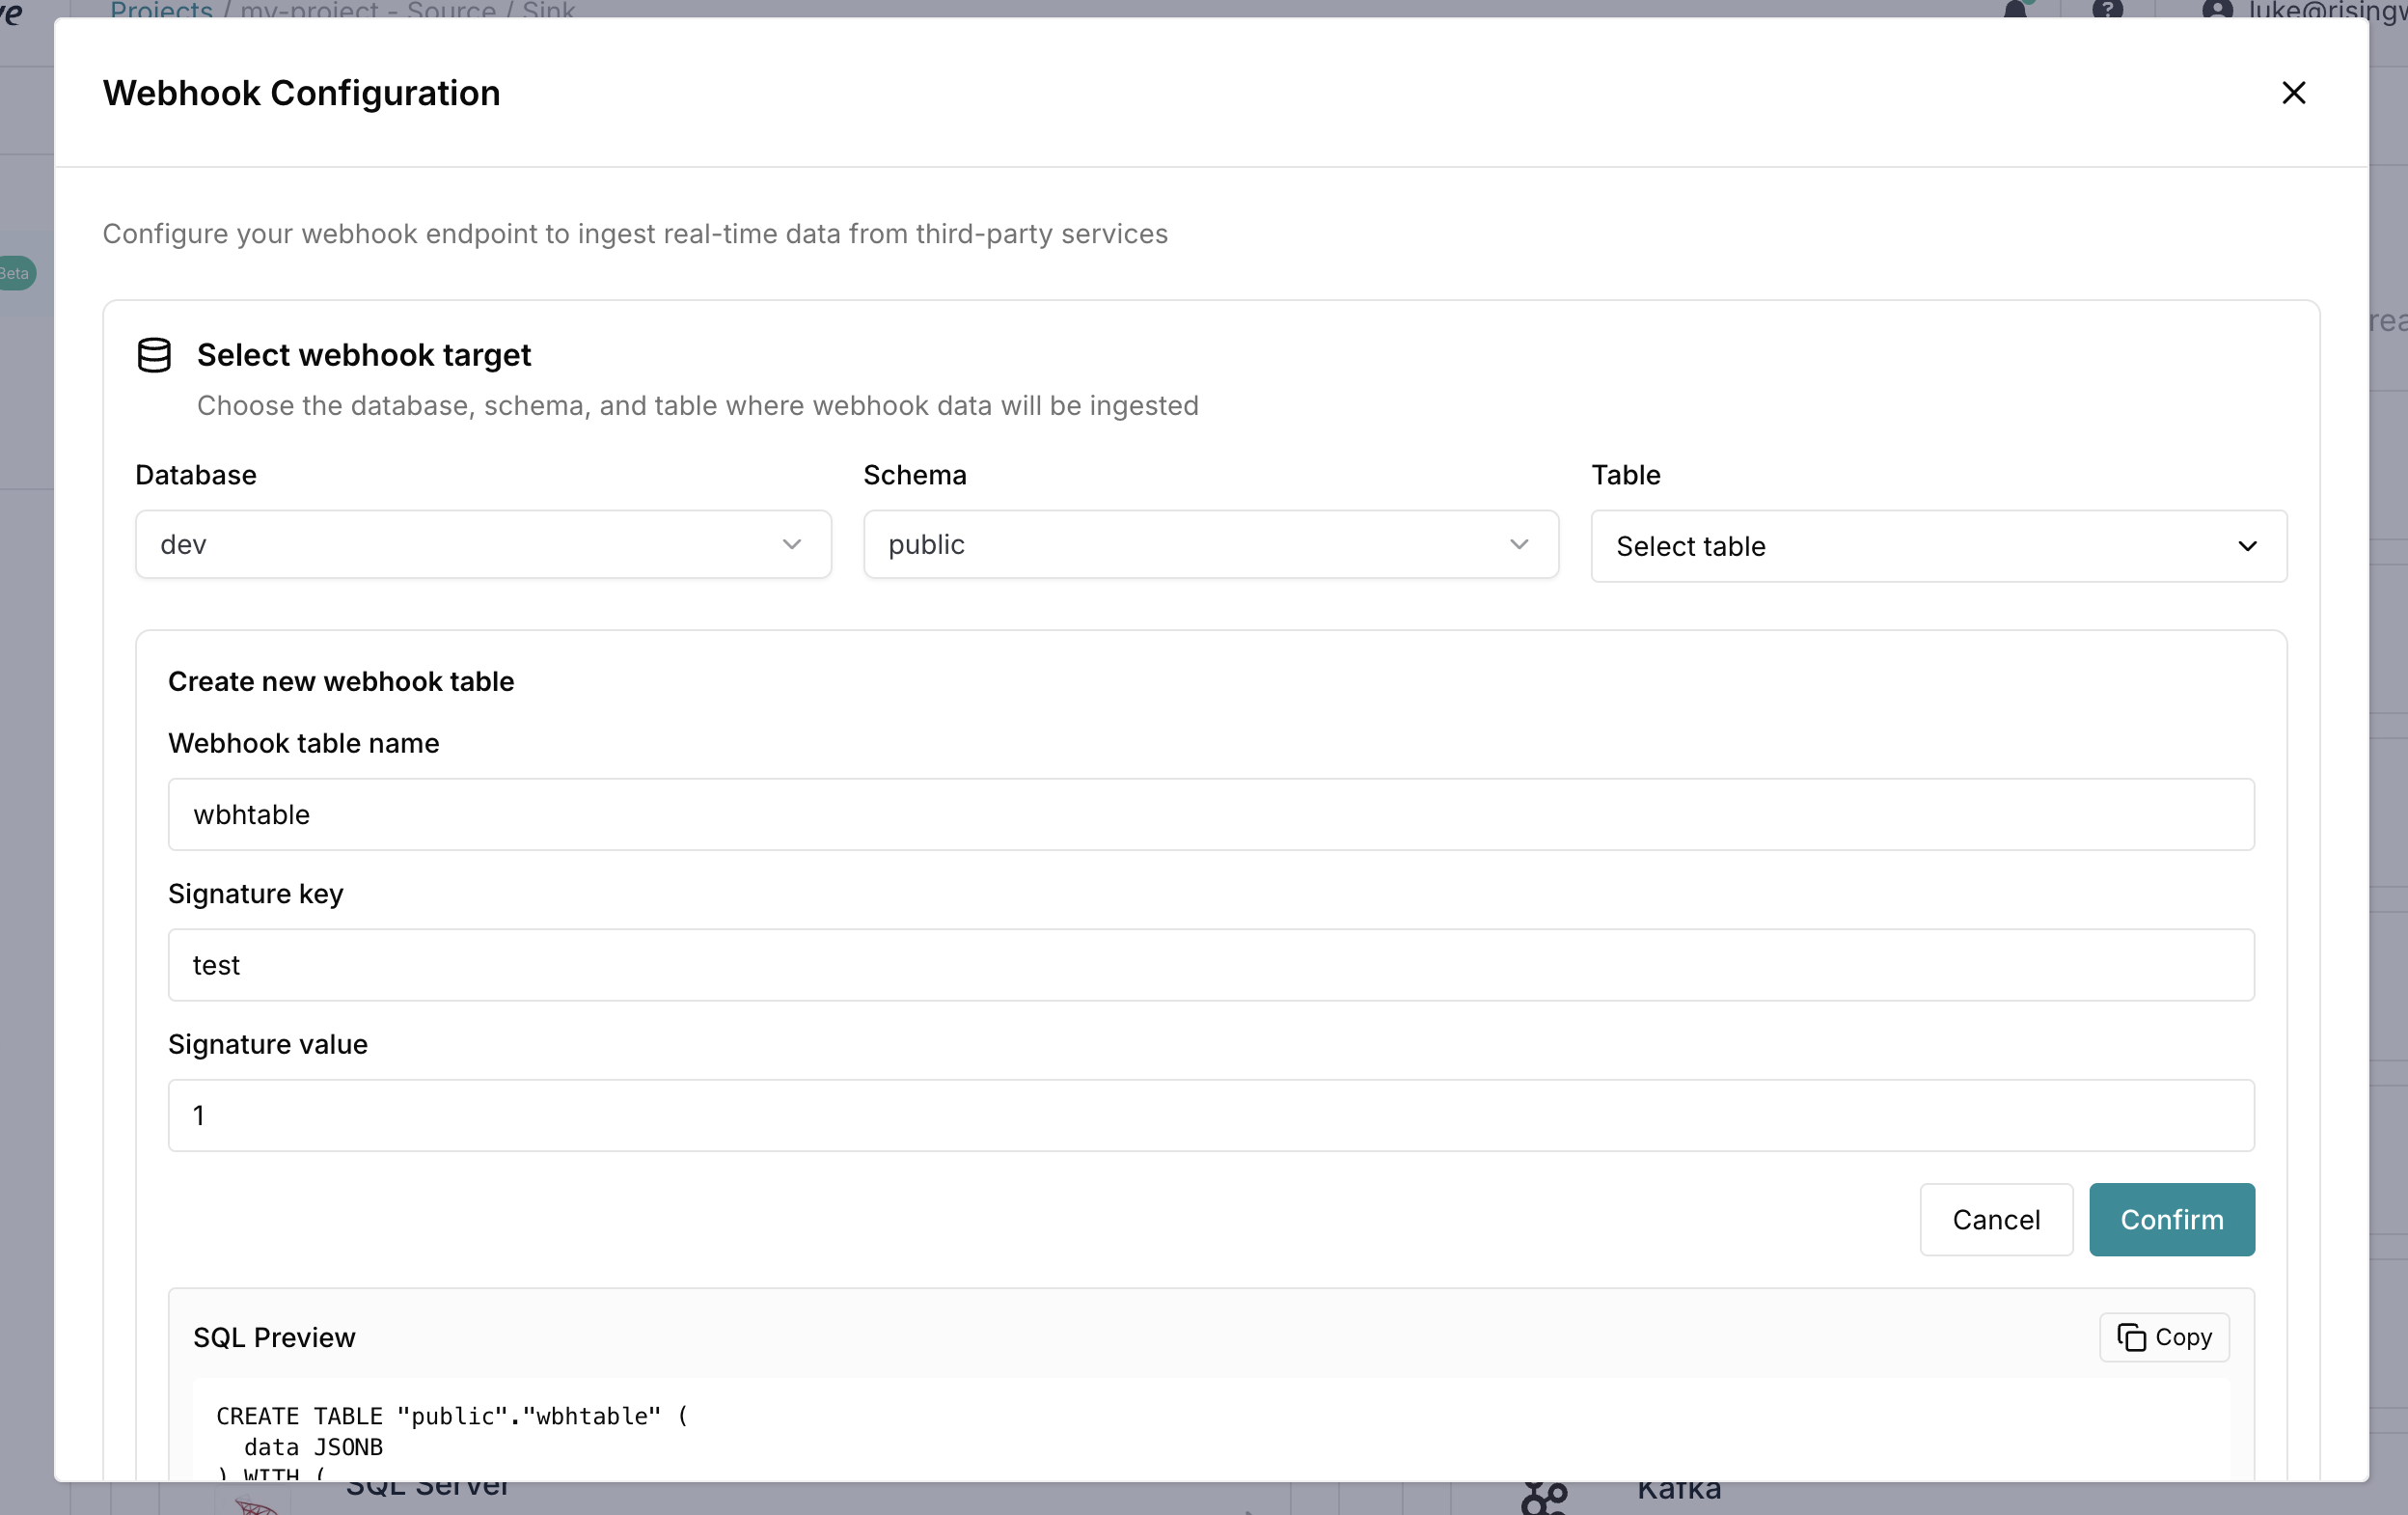
- Select Database, Schema, and Table.
- (Optional) Use Create new webhook table to generate SQL, preview it, and run it.
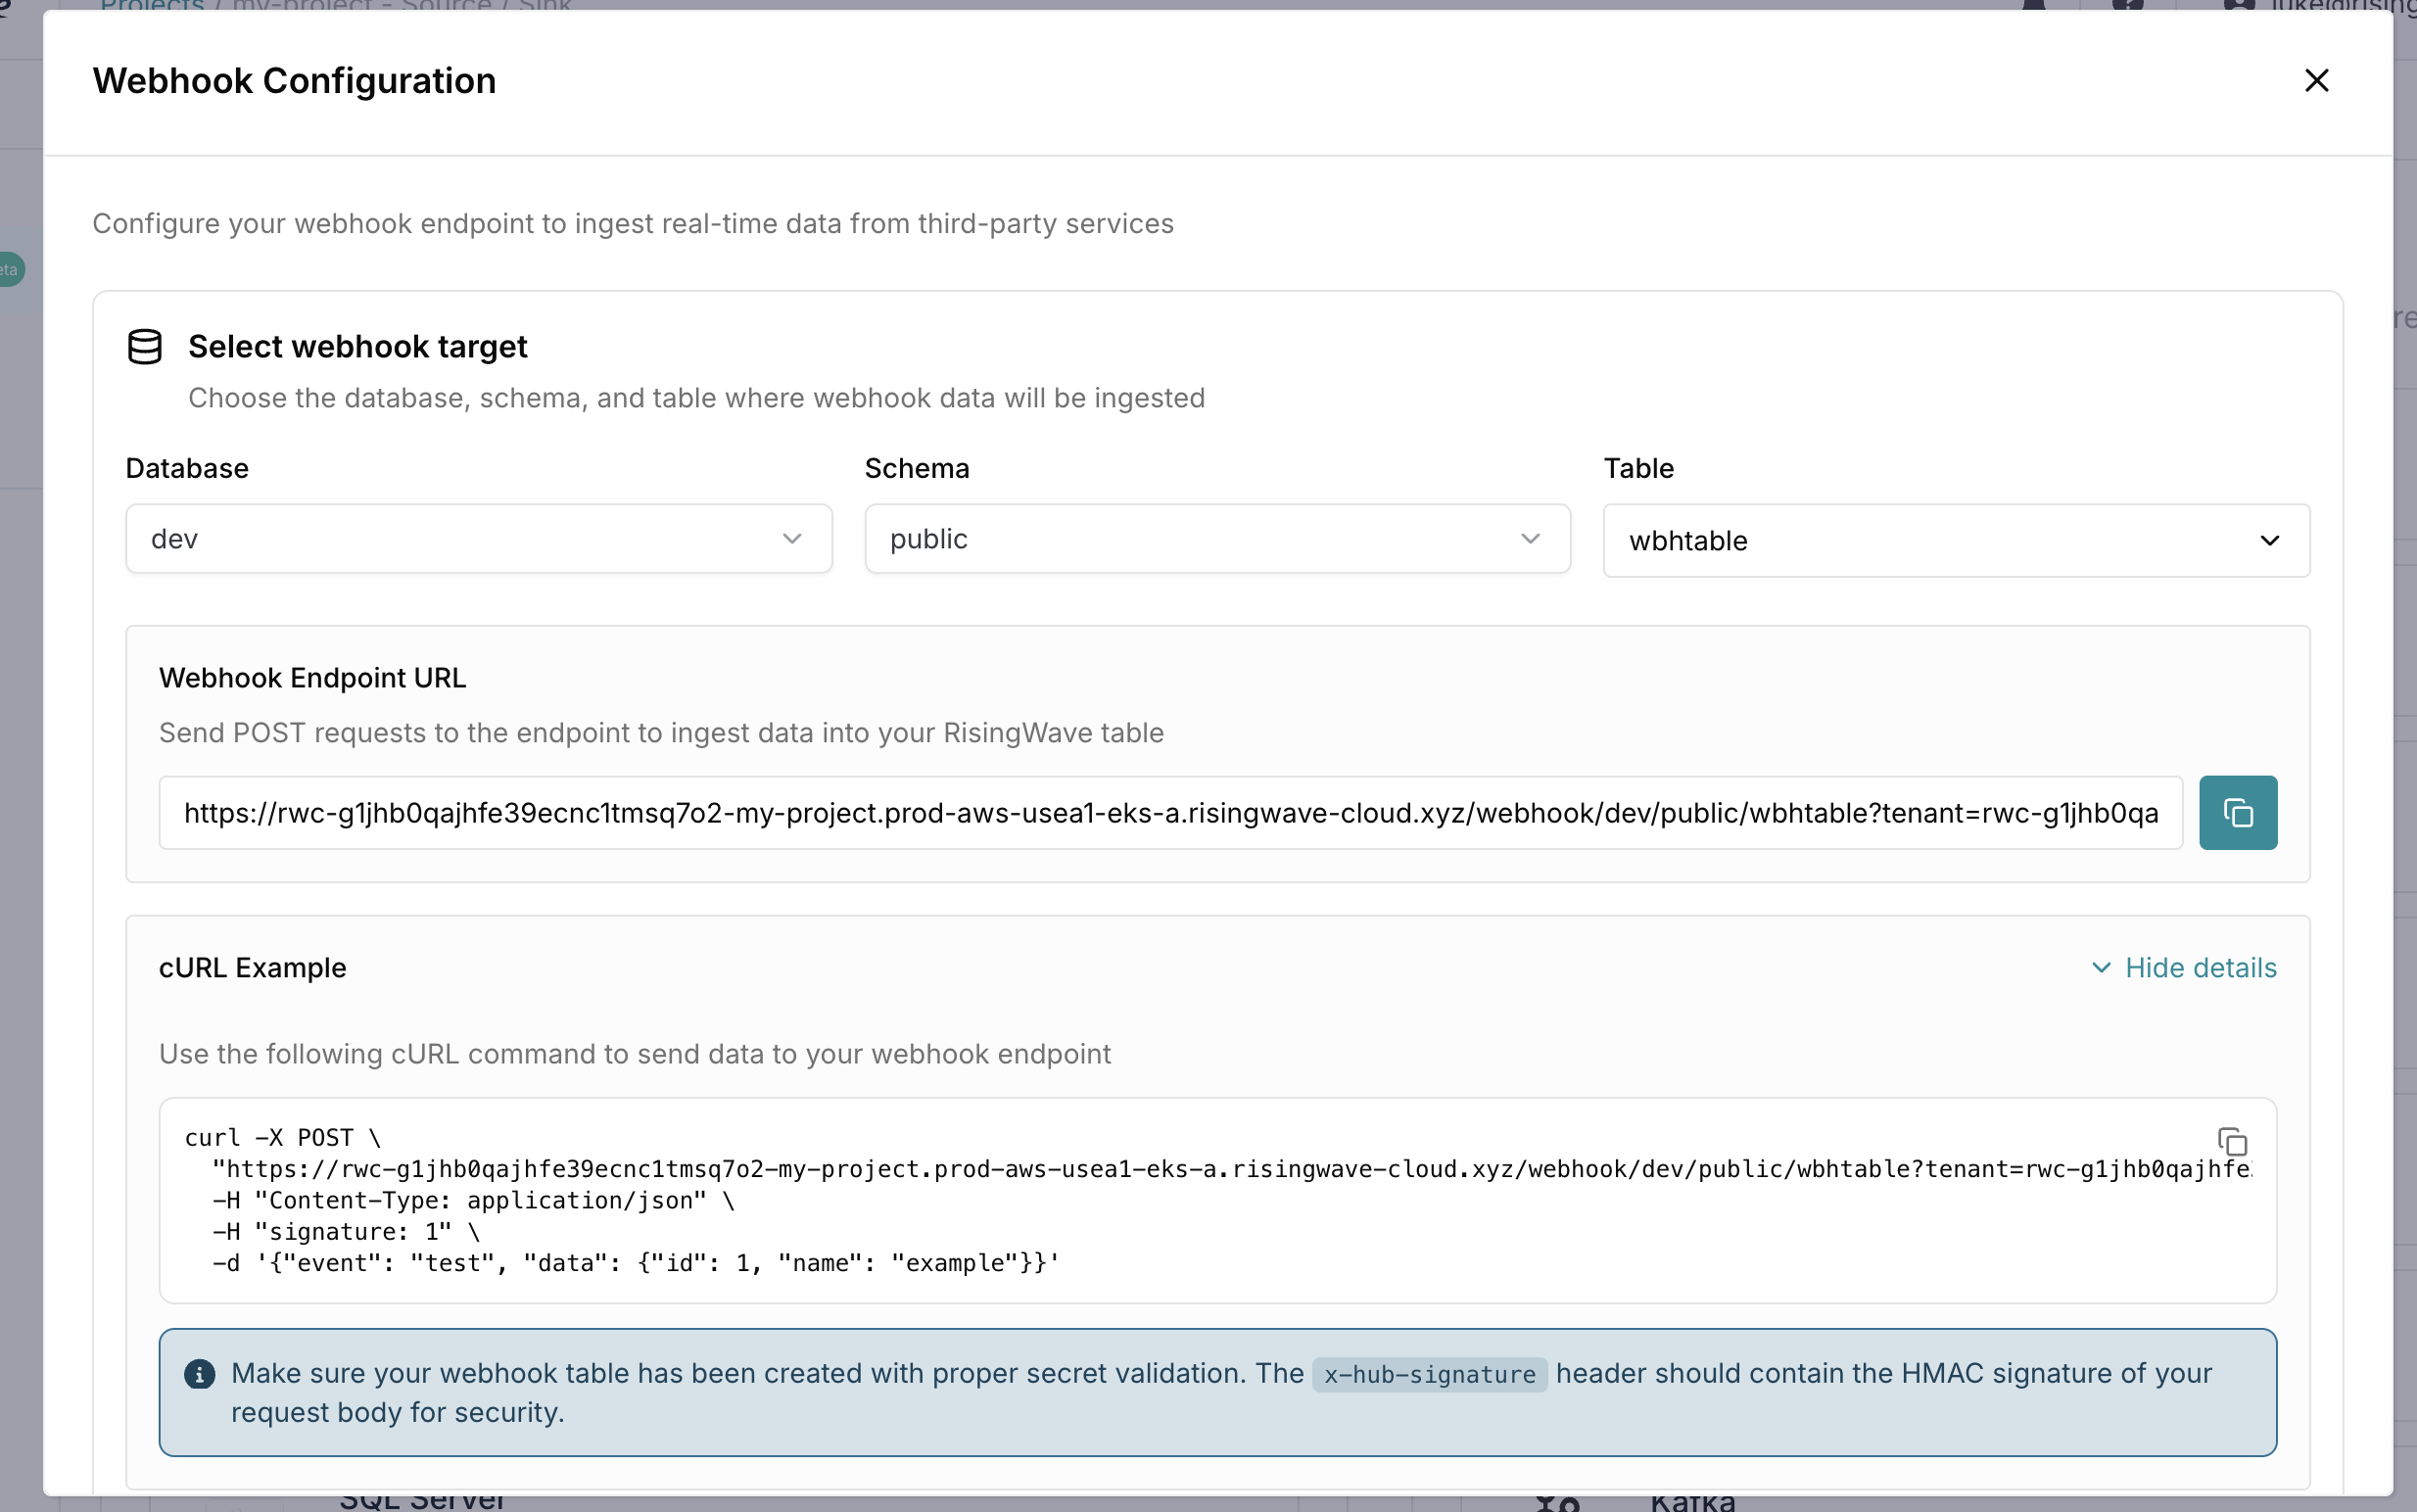
- Copy the generated Webhook Endpoint URL.
- Expand cURL Example and copy the generated command.