Why choose Connect
Building streaming pipelines typically involves coordinating multiple systems, custom connector configuration, and managing schema evolution. Connect streamlines this workflow by:- Providing a single place to manage all sources and sinks.
- Offering wizard-driven workflows that guide users through setup.
- Automatically generating and applying the correct SQL for connectors.
- Reducing the overhead required to move from initial setup to production.
When to use Connect
Use Connect when you want to:- Build real-time ingestion and delivery pipelines with minimal setup.
- Onboard new data systems quickly—without writing scripts or SQL manually.
- Create pipelines that primarily require direct replication or light transformations.
- Speed up development workflows or empower less experienced team members to set up data flows safely.
Create a pipeline with Connect
To start using Connect in RisingWave Cloud:- Navigate to Projects page and select a project.
- In the left sidebar, click RW Connect.
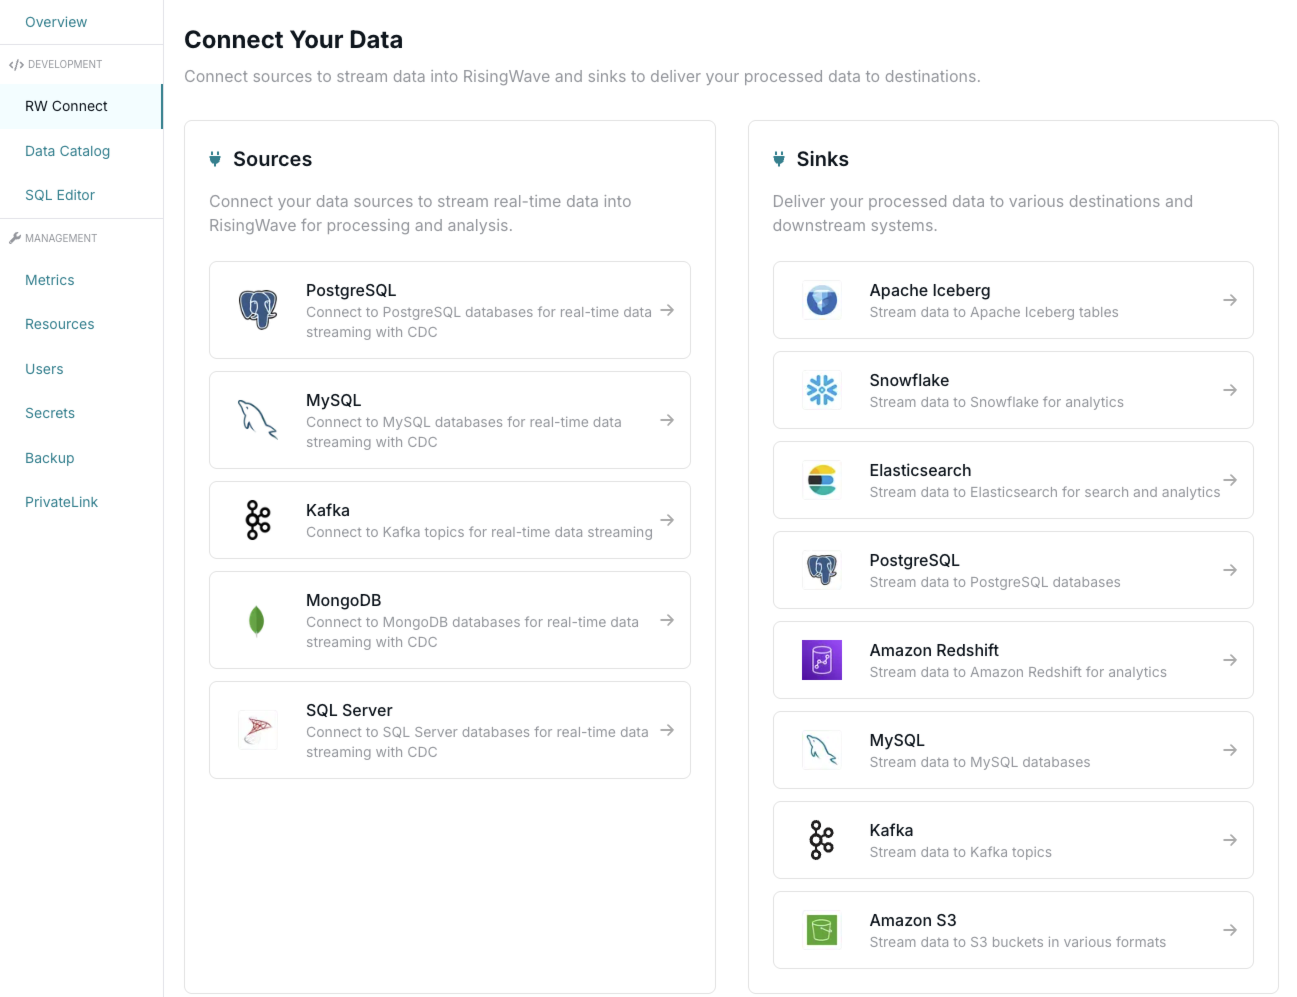
Set up sources
Connect your data sources to stream real-time data into RisingWave for processing and analysis. Supported sources include:- PostgreSQL
- MySQL
- Kafka
- MongoDB
- SQL Server
Configure & Test Connection
Enter the PostgreSQL connection details and test the connection to ensure RisingWave can access your source database.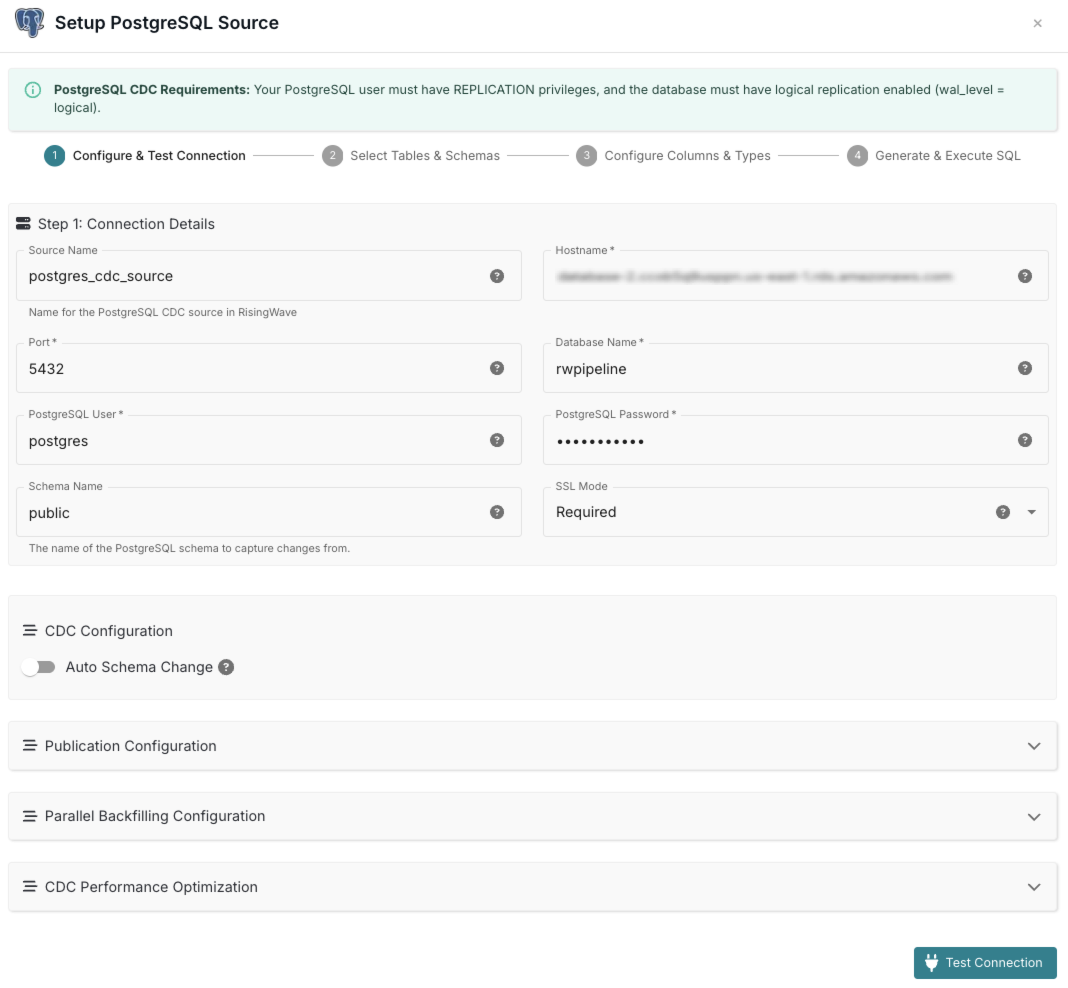
Select Tables & Schemas
Choose the schemas and tables from your PostgreSQL database that you want to replicate into RisingWave.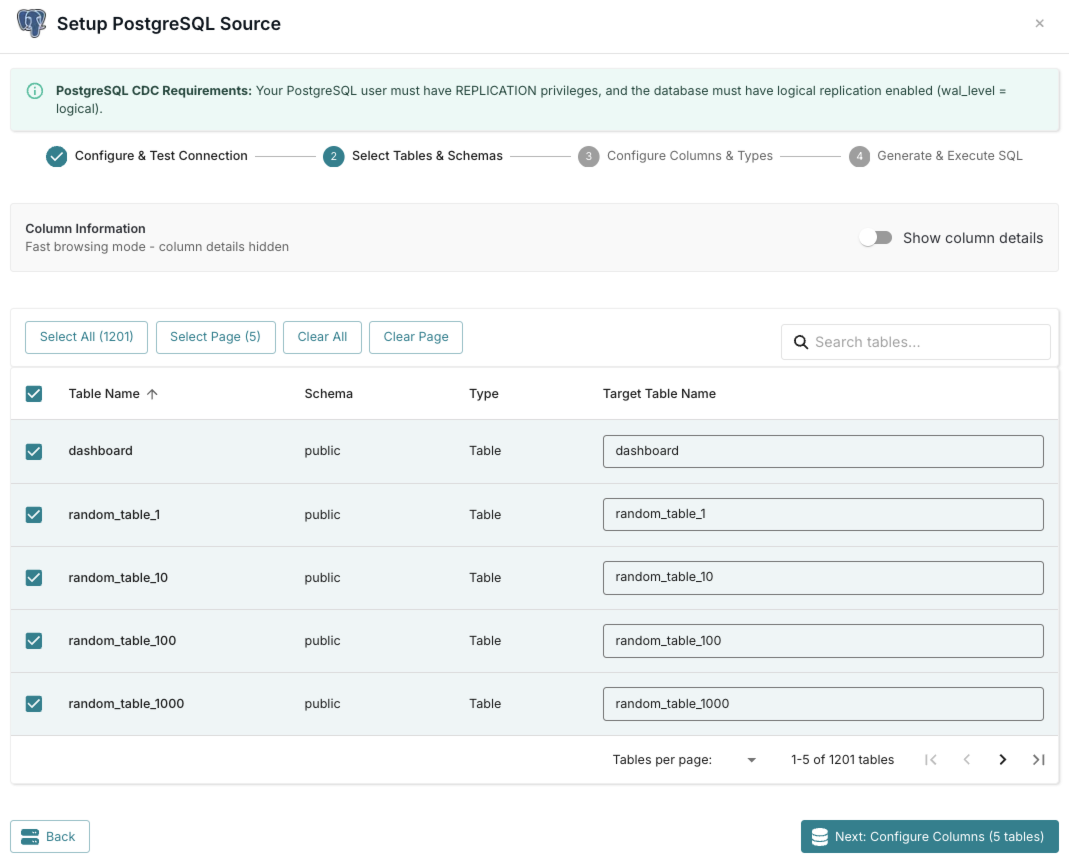
Configure Columns & Types
Select specific columns, review data types, and define primary keys for your selected tables.

Set up sinks
Deliver your processed data to various destinations and downstream systems. Supported sinks include:- Apache Iceberg
- Snowflake
- Elasticsearch
- PostgreSQL
- Amazon Redshift
- MySQL
- Kafka
- Amazon S3
Table Selection
Choose the tables from your database that you want to sink to Redshift. You can select multiple tables to create multiple sinks at once.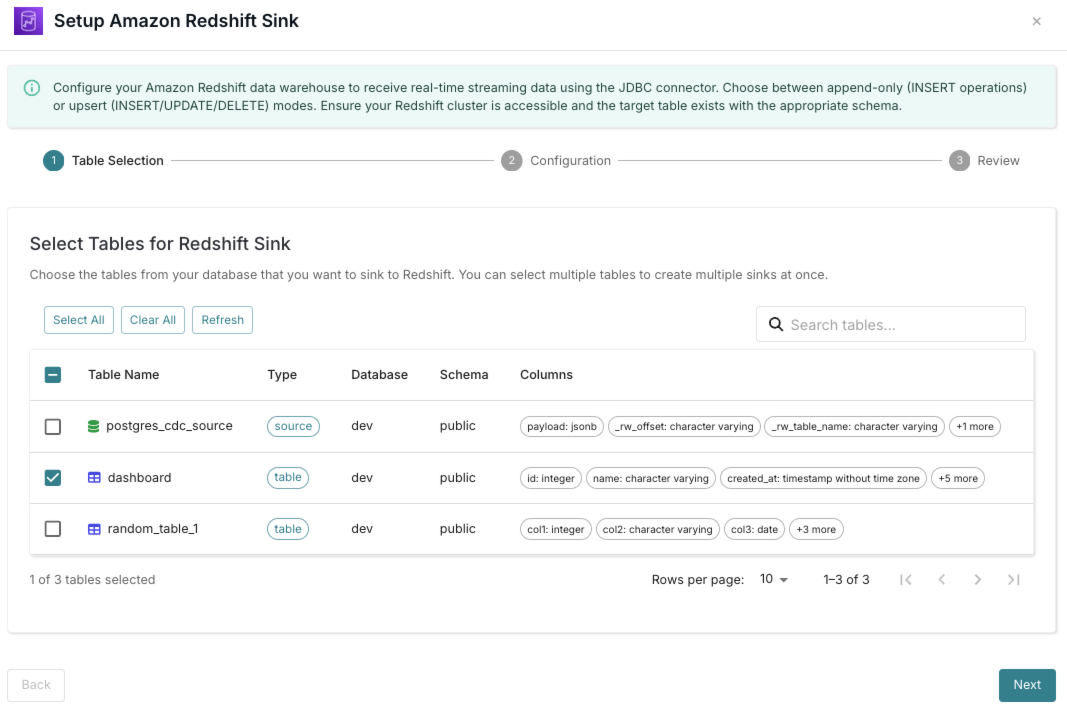
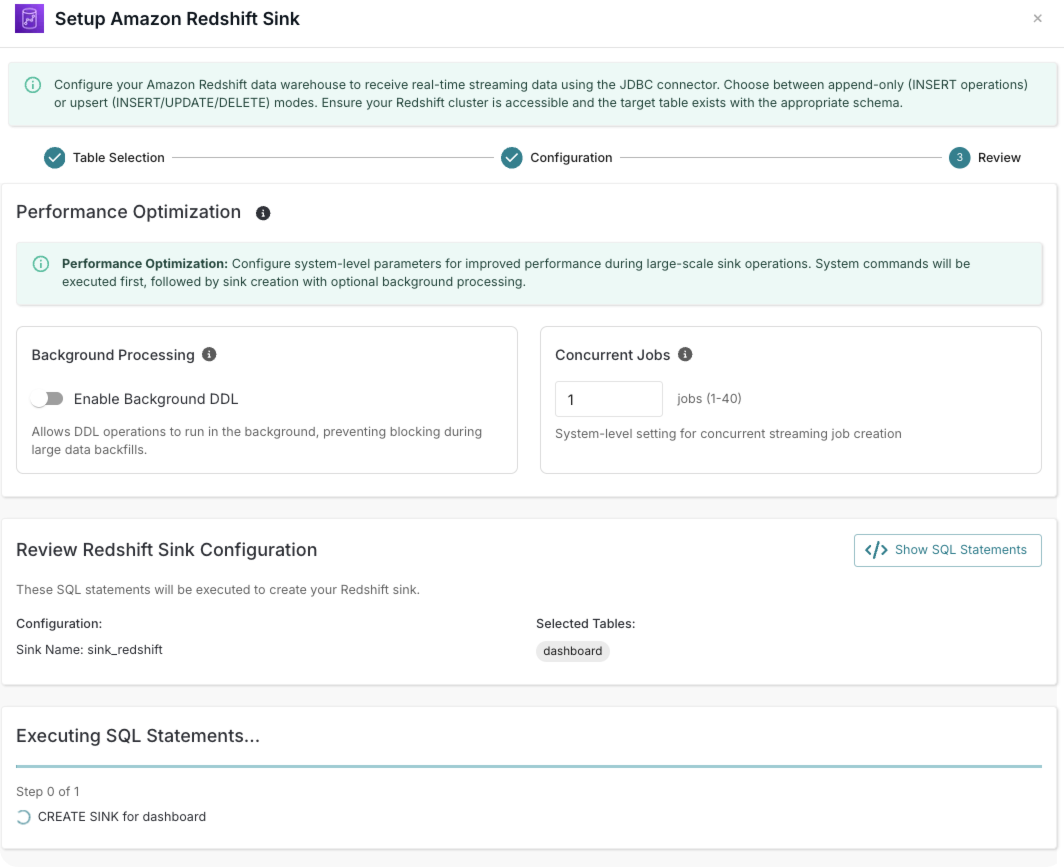
Configuration
Configure the connection details and settings for your Redshift sink, including authentication, data mapping, and S3 intermediate staging.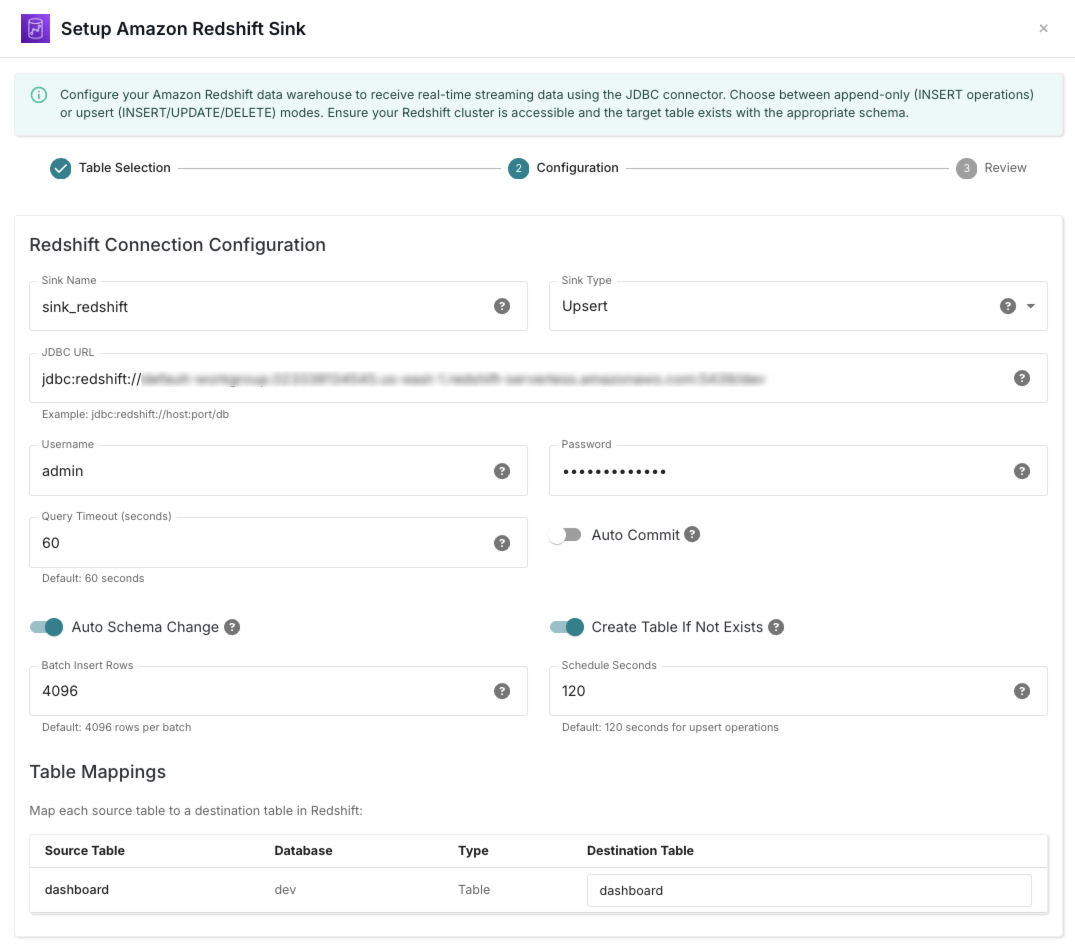
Next steps
With sources and sinks configured, your pipelines begin running immediately. From here you can:- Monitor pipeline status in the RisingWave Cloud UI.
- Add materialized views to perform streaming transformations.
- Add new tables, schemas, or connectors as your system evolves.
- Modify or delete pipelines directly within RisingWave Connect.