- Connect RisingWave to Superset.
- Create a dashboard.
Prerequisites
Install and start RisingWave
To install and start RisingWave locally, see the Get started guide. We recommend running RisingWave locally for demo purposes. Connect to a streaming source. For details on connecting to streaming sources and what sources are supported with RisingWave, see CREATE SOURCE.Install Apache Superset
To install Apache Superset, follow the instructions in Installing locally using Docker Compose. This guide will cover how to install the database driver in Docker, so we recommend installing it using Docker Compose.Establish the connection between Superset and RisingWave
Start Apache Superset
Launch an instance of Apache Superset by following the instructions in Launch Superset through Docker Compose. To start Superset, enterhttp://localhost:8088 into your web browser.
If it is your first time starting Superset and the webpage asks for a username and password, use admin for both.
The following UI page should appear.

Connect to RisingWave
Note that, the new version of RisingWave implements a wrapper on top of the original PostgreSQL SQLAlchemy driver. Therefore, we recommend using the connector library sqlalchemy-risingwave instead of psycopg2. If the driver is not installed in the Docker container, you can install it by running the following commands:
- In Superset, select Settings > Database connections.
- Click + Database.
- In the window that pops up, scroll to the bottom and select “Connect this database with a SQLAlchemy URI string instead.”

- Fill in SQLAlchemy URI, e.g.,
risingwave://root@host.docker.internal:4566/dev.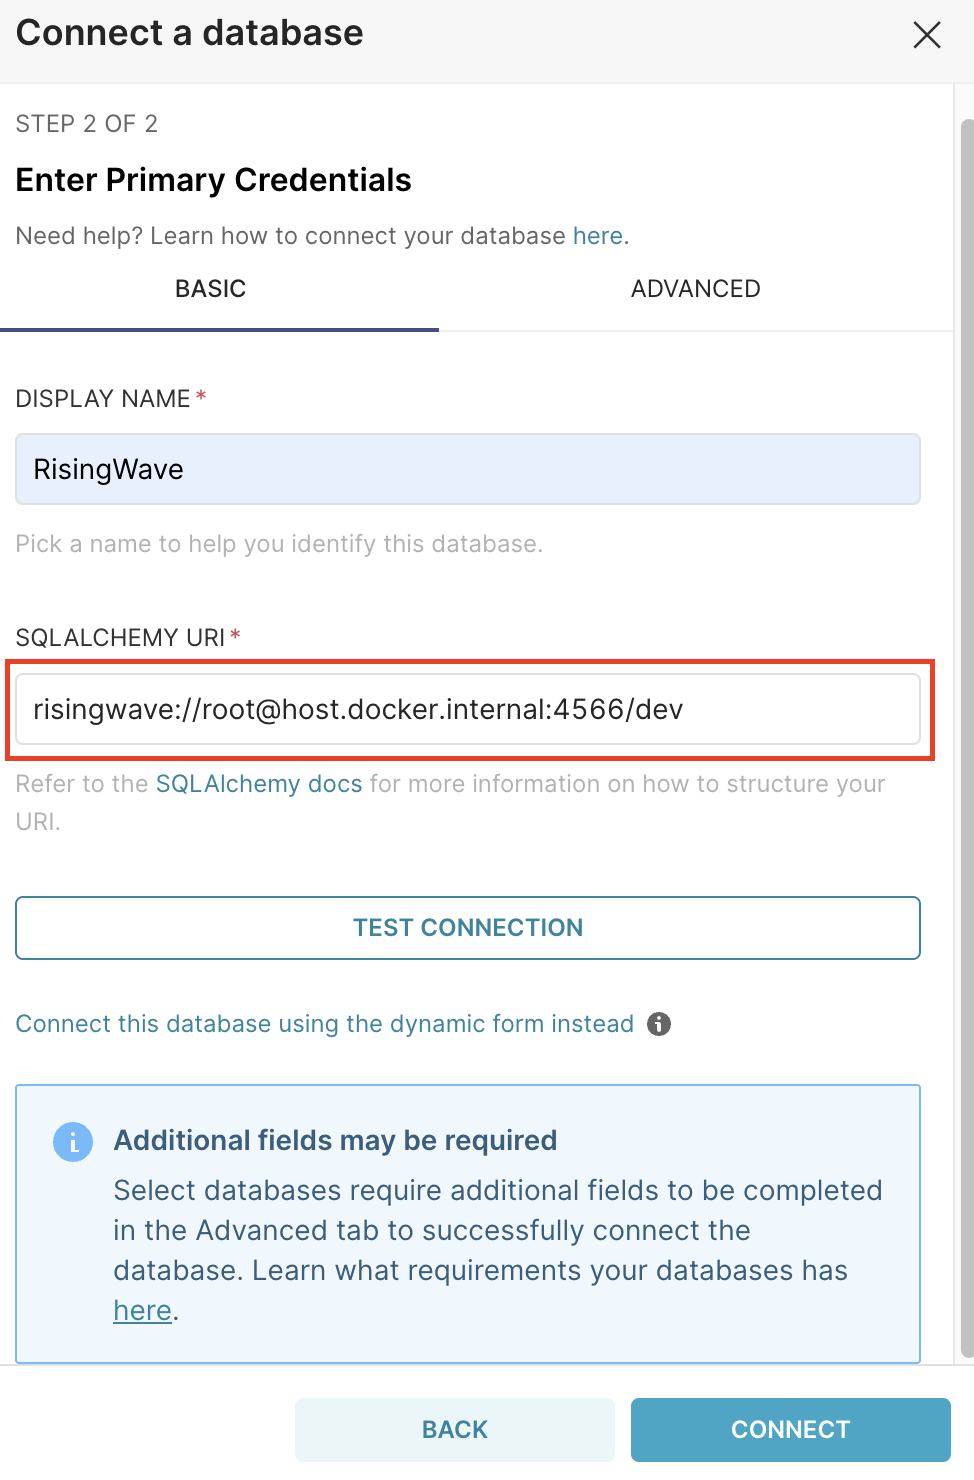
- Click Connect.
Create a dashboard
Create tables or materialized views in RisingWave
Instead of using Superset to create materialized views or tables, use RisingWave. For this guide, we will create the tablet and insert some data.
Once RisingWave starts, use the following queries to create the table t and insert some values to the table.
Create and export tables or materialized views
Export the data from materialized views or tables in RisingWave to Superset:- Select Datasets then + Dataset.
- In the window that pops up, under Database, select RisingWave.
- Under Schema, select the schema the table or materialized view was created in. By default, they are in the
publicschema. - Select the materialized view or table to be exported to Superset. In this guide, we’ll select
t.
Create a dashboard in Superset
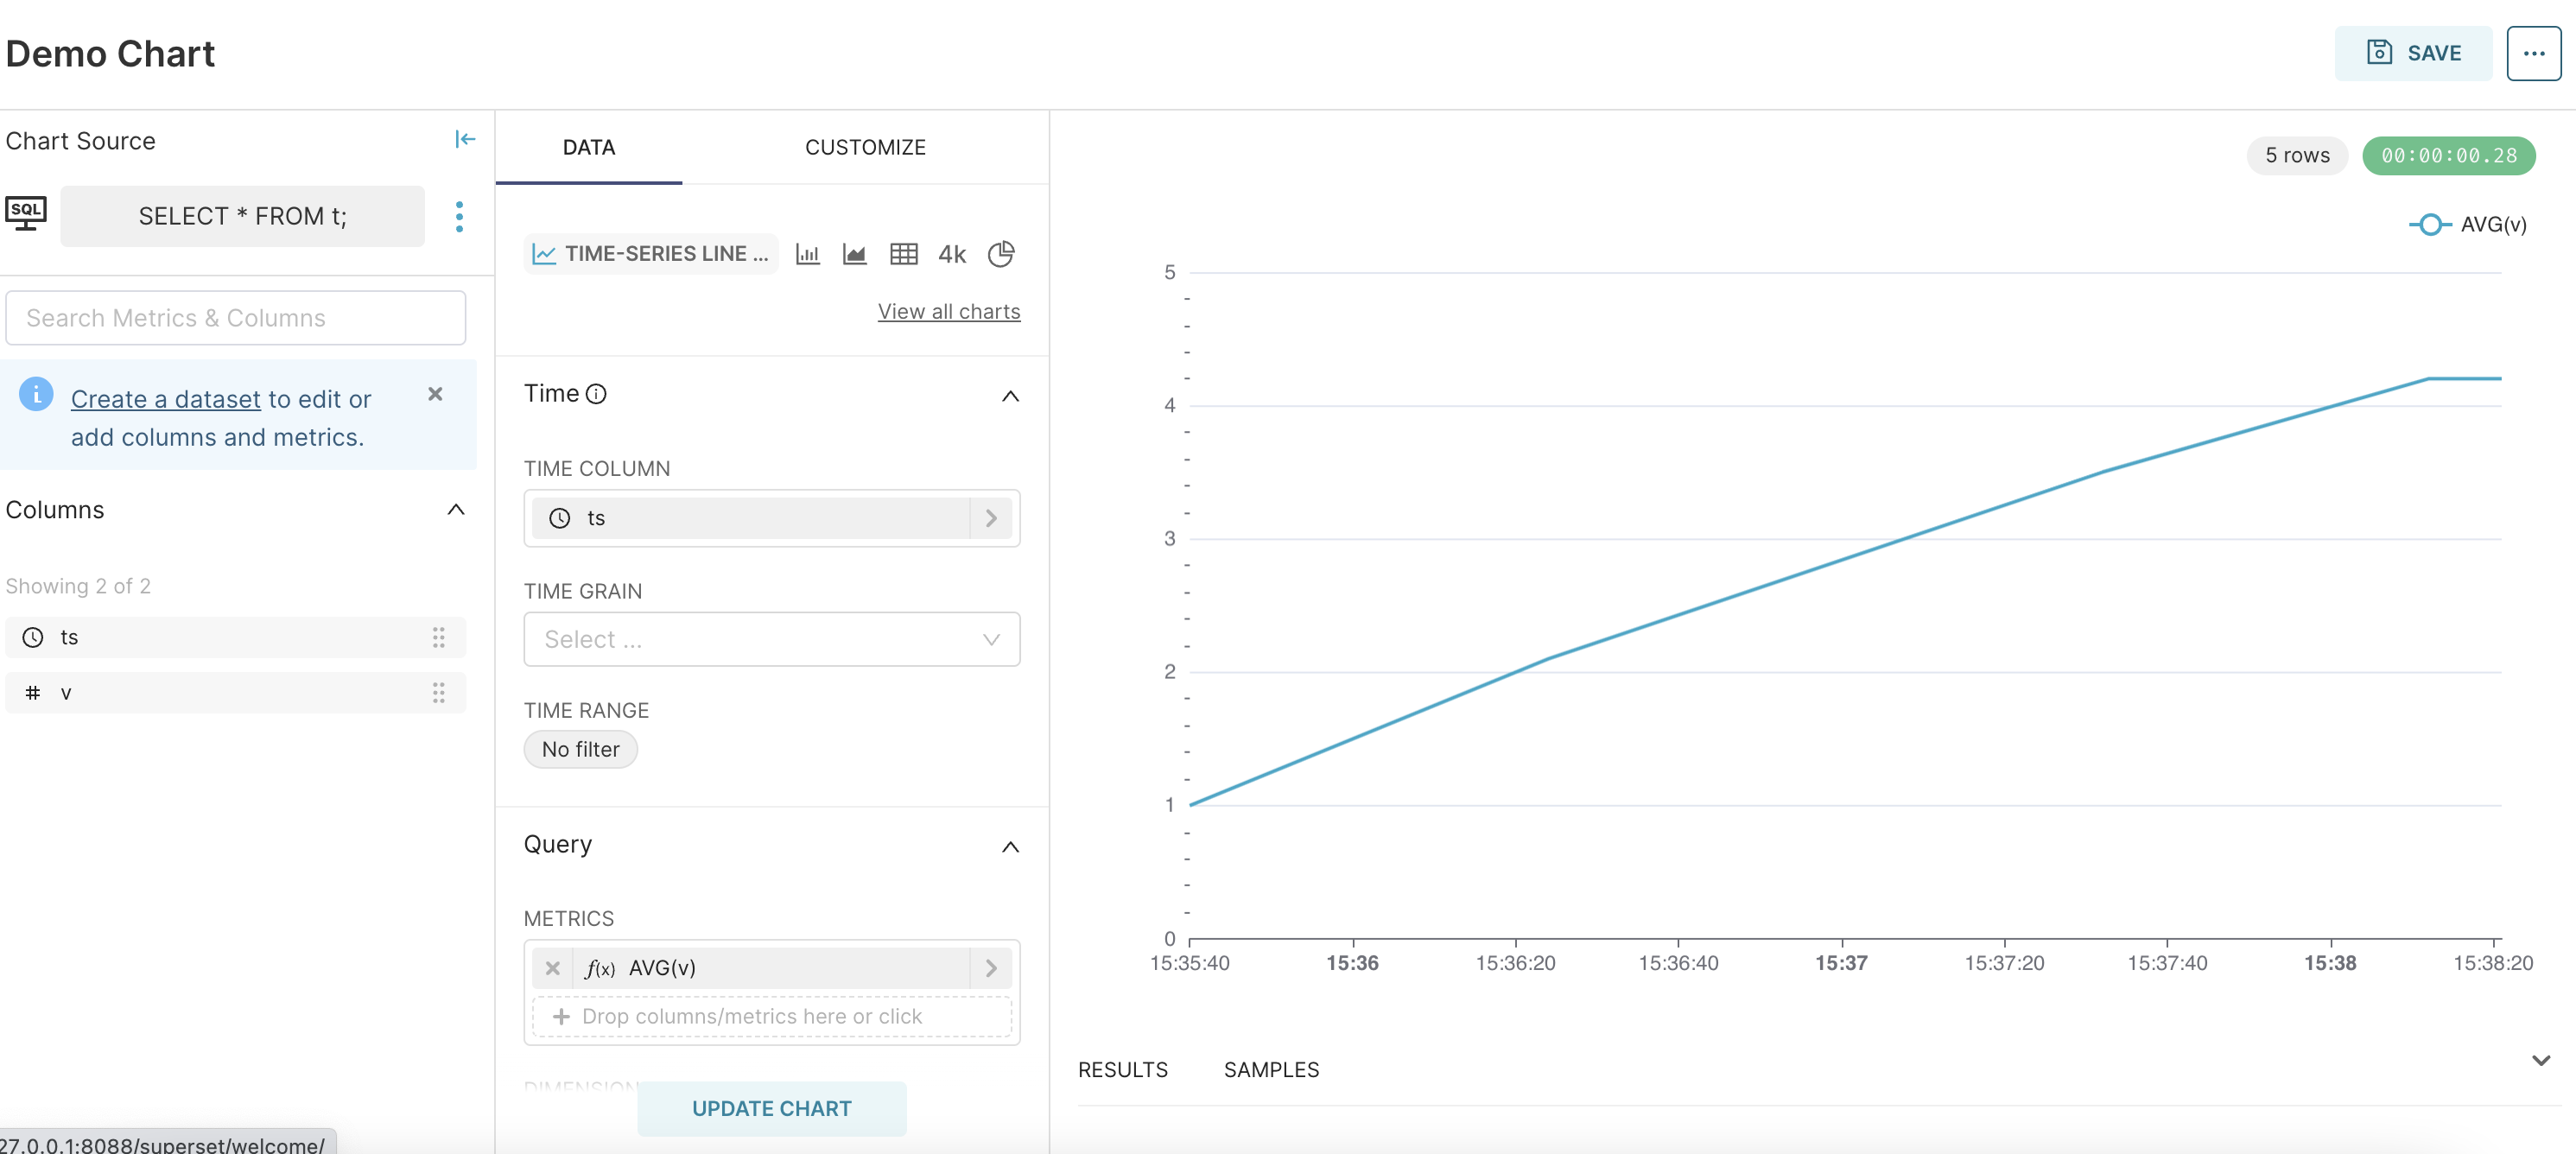
To create a dashboard based on the tablet:
- Click Create chart.
- Select table
t. - Select Time-series line chart as the rendering method.
- Specify
tsas the time column. - Specify
AVG(v)as the metric. - Click Update chart. The query results will be rendered into a line chart.