sts:AssumeRole to obtain temporary credentials for your AWS IAM role. This avoids storing long-term access keys and follows AWS security best practices.
Use this method when you want RisingWave Cloud to read from or write to an S3 bucket in your AWS account using a role you control.
How it works
- You create an IAM role in your AWS account with the required S3 permissions.
- You configure the role’s trust policy to allow RisingWave Cloud’s IAM role ARN to assume it.
- You set
s3.assume_role(ors3.iam_role_arn) in your RisingWave SQL statement to the ARN of your role.
Required cloud metadata values
Before you begin, retrieve the following values from your cluster’s Cloud metadata page in the RisingWave Cloud Console (Network Access → Cloud Meta tab):| Metadata field | Where it’s used |
|---|---|
| Workload Identity (IAM Role ARN) | The Principal.AWS value in your IAM trust policy |
Step-by-step setup
Step 1 — Create an IAM policy for S3 access
Create a policy that grants RisingWave the necessary permissions on your S3 bucket. Replace<bucket> and <prefix> with your values.
Example: S3 read/write policy
Step 2 — Create an IAM role with the policy attached
- In the AWS IAM console, create a new role.
- Select Another AWS account as the trusted entity type and enter the AWS account ID extracted from the Workload Identity (IAM Role ARN) (the 12-digit number after
iam::). - Attach the S3 policy created in Step 1.
Step 3 — Configure the trust policy
After the role is created, update its trust policy to allow the specific RisingWave Cloud IAM role to assume it. Replace<iam-role-arn> with the Workload Identity (IAM Role ARN) from Cloud metadata.
Example: Trust policy
Step 4 — Register the role in Allowed Principals
Add your IAM role ARN to your cluster’s Allowed Principals list in the RisingWave Cloud Console to authorize RisingWave Cloud’s principal to assume this role for the cluster. See Managing allowed principals below for the exact steps.Step 5 — Use the role in RisingWave
Sets3.assume_role to the ARN of the role you created in Step 2 and set enable_config_load = 'true'.
Example: Sink using IAM role assume
s3.iam_role_arn instead of s3.assume_role (for example, the Iceberg connector), use:
Example: Iceberg connector with IAM role assume
Verify the setup
After creating the sink or source, run a quick sanity check:- Check that the role is assumable — in the AWS console, use IAM → Roles → <your-role> → Trust relationships to confirm the correct principal and condition are present.
- Check S3 permissions — run an
aws s3 ls s3://<bucket>/<prefix>/command using the role (viaaws sts assume-role) to verify read access. - Check RisingWave logs — if the sink or source fails, look for
AccessDeniedorInvalidClientTokenIderrors. These indicate a misconfigured trust policy or incorrect ARN.
Common errors
| Error | Likely cause | Fix |
|---|---|---|
AccessDenied when calling AssumeRole | The trust policy principal doesn’t match the RisingWave Cloud IAM role ARN | Copy the exact Workload Identity (IAM Role ARN) from Cloud metadata and update the trust policy |
AccessDenied on S3 operations after assuming | The attached S3 policy is missing required actions | Add the missing S3 actions (see Step 1) |
InvalidClientTokenId | Incorrect IAM role ARN in the trust policy | Use the Workload Identity (IAM Role ARN) from Cloud metadata |
Managing allowed principals in RisingWave Cloud
To view and manage the IAM role ARNs that are authorized to access your cluster’s resources via IAM Assume Role, go to your cluster in the RisingWave Cloud Console, click Network Access in the left sidebar, and select the Allowed Principals tab.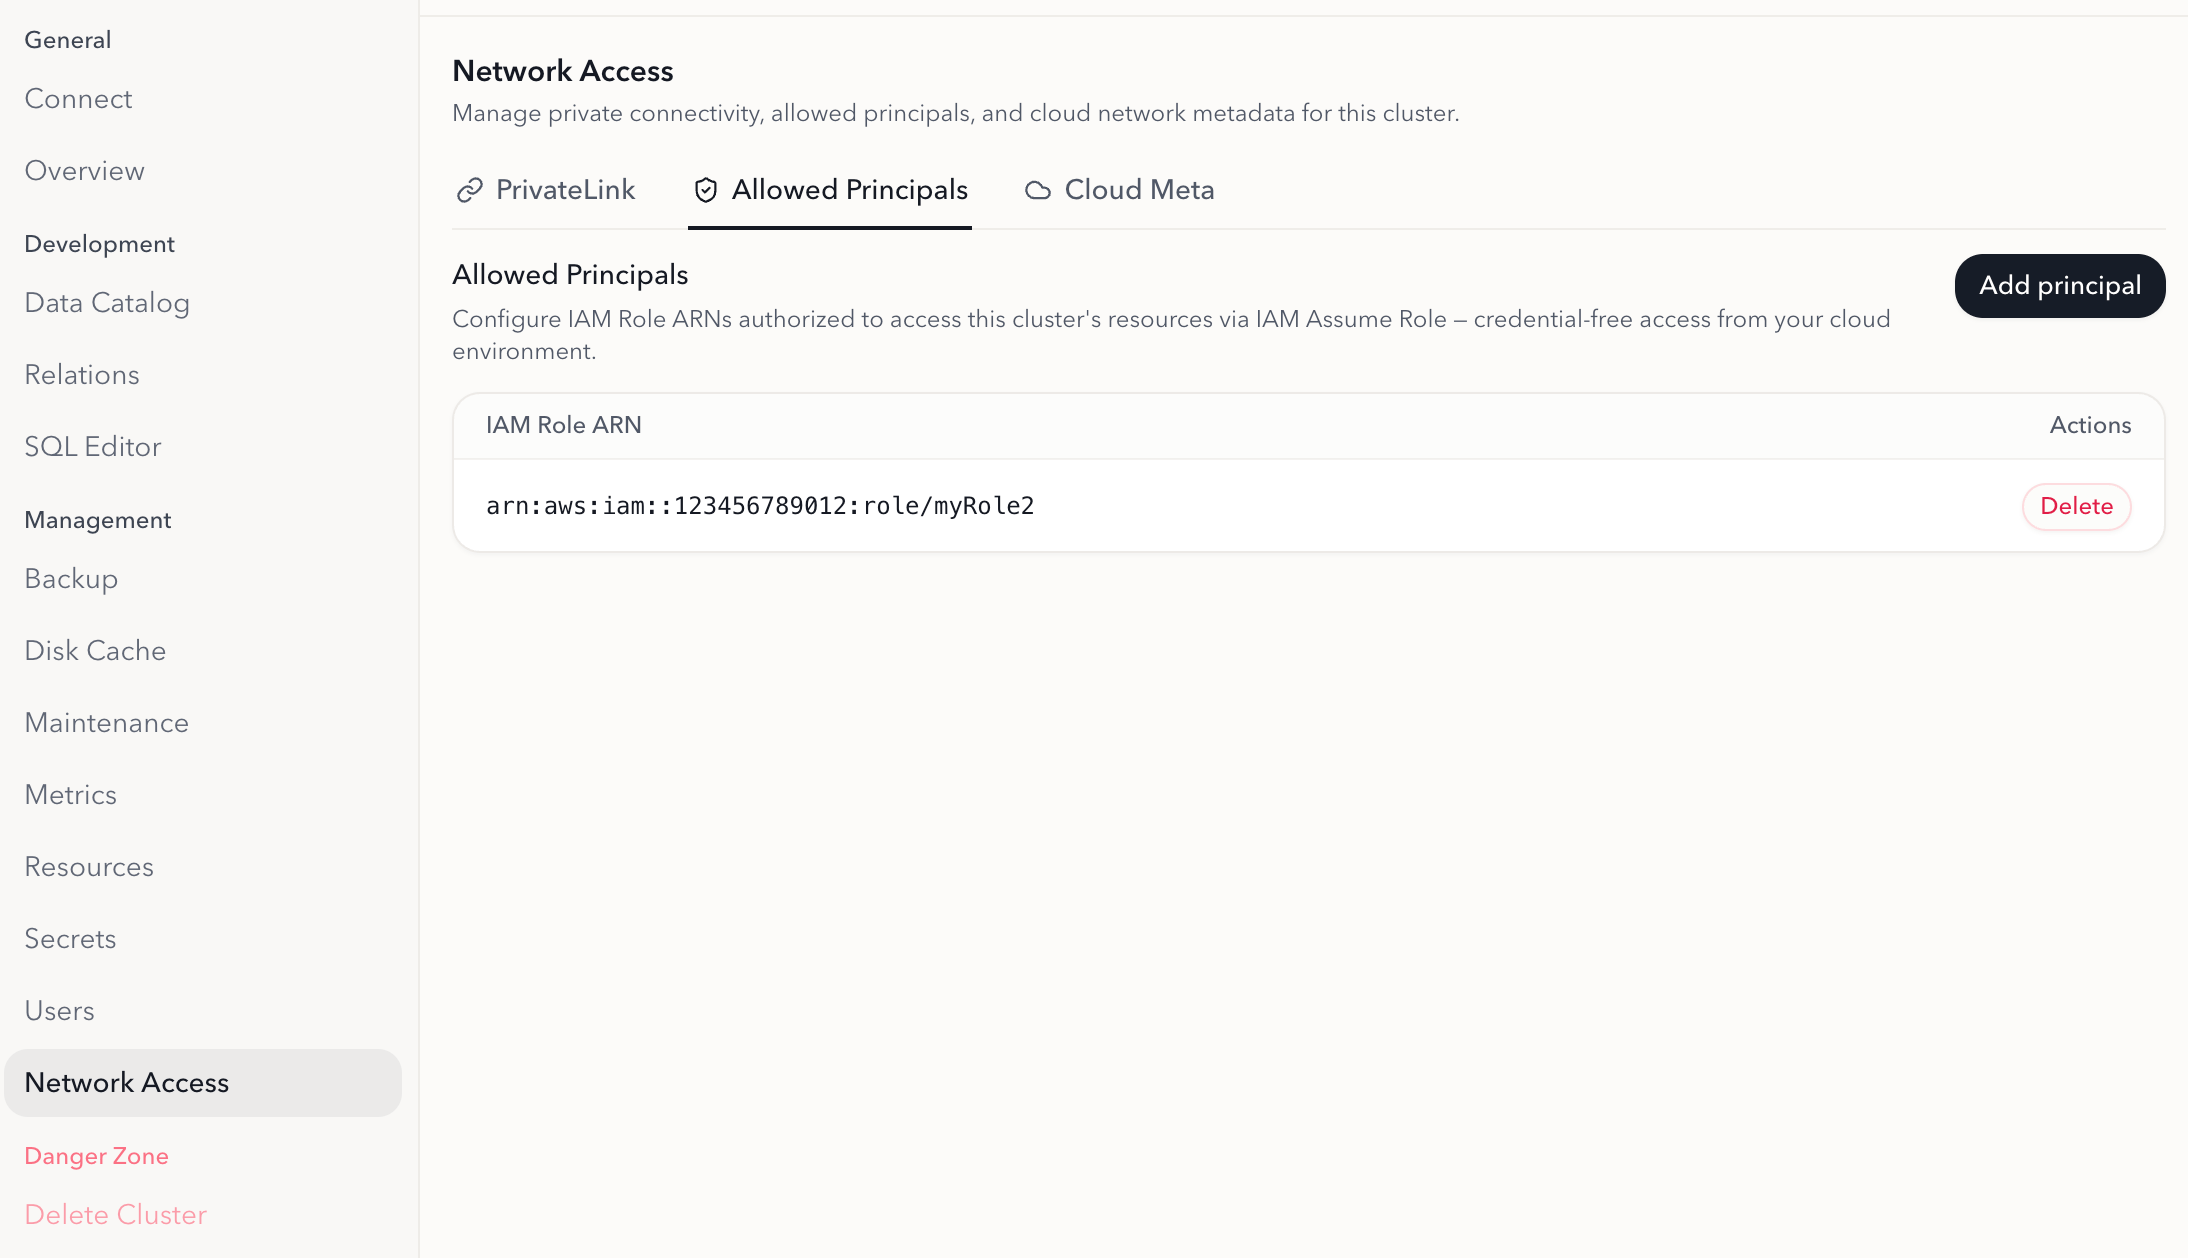
Related pages
- Cloud metadata — retrieve the IAM role ARN for your cluster
- PrivateLink connection configuration — set up private network connectivity
- Sink to Amazon Redshift — end-to-end example with S3 staging
- Sink to Snowflake — end-to-end example with S3 staging